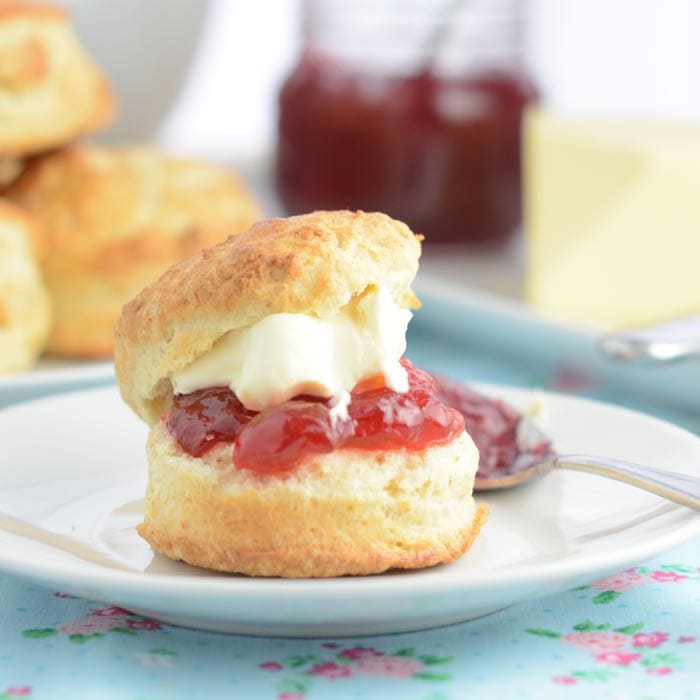
How to make the perfect afternoon tea treat – scones. Once they’ve baked, enjoy them with butter, jam and plenty of clotted cream.
That’s the very question I’ve set out to answer over the past couple of weeks. In order to answer it I’ve baked (and eaten) batch after batch after batch after batch after batch after batch, you get the idea. Each batch subtly different from the last, until I found just what I was looking for – how to cook the perfect scone (fortunately I made single scone batches each time so I shouldn’t get too fat!).
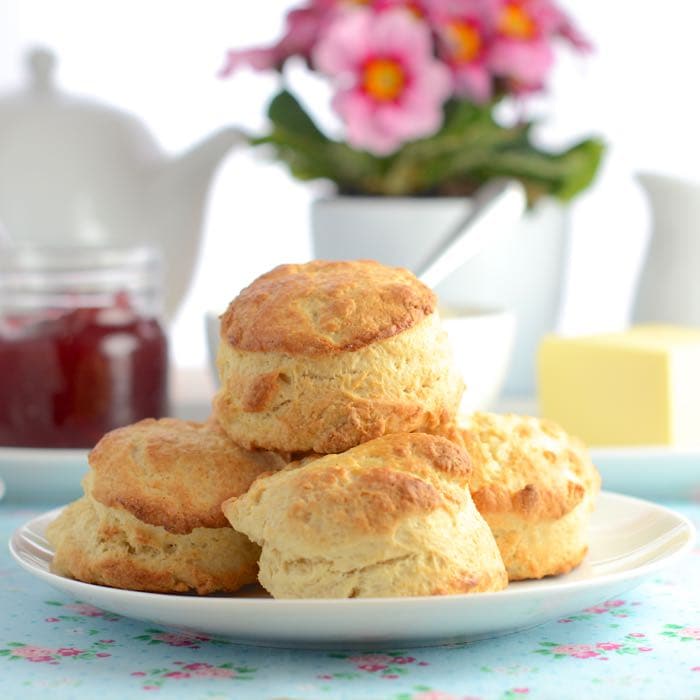
I was planning on adding a nice picture here to show how much difference a subtle change in ingredients can make to the look of the scone. However, they didn’t really look all that different, so instead I’ve added another yummy scone picture 🙂 .
 I always think that traditional foods like scones should have one perfect recipe that everyone follows. However, as with everything else I think should have one simple recipe that everyone agree on, there are hundreds, each with the writers own little twist.
After trying out all these little “twists”, it turns out that (in my opinion) in the case of scones a simple recipe is actually best. I’ve ended up playing around a bit with the quantities and I do like to add baking powder as it makes them rise better, but apart from that I don’t think switching buttermilk for milk or icing sugar for caster sugar makes them better (actually I think it makes them worse).

My perfect scone experiment
I started with a basic recipe of…
- 500g plain flour
- 100g butter
- 250ml milk
- 50g caster sugar
- Pinch of salt
and made little changes each time.
- Some recipes use more butter and less milk – These had a nice flavour but I found the texture a bit too crumbly.
- Similarly more milk, less butter were a bit bland (lacking the extra flavour from the butter).
- Adding baking powder made the scones slightly higher, making them lighter and fluffier.
- Switching caster sugar for icing sugar made no difference to the texture and the sweetness of the sugar got a bit lost, meaning you’d need more of it.
- Switching milk for buttermilk seems to be quite a popular recommendation and did make them moister, but it made them a lot more bland. I also thought it made them taste more cakey and less sconey (if those are words).
- Full-fat milk gives a much better flavour than skimmed milk.
- Adding egg made the scones dry and more cakey in texture.
- Cooking the scones for longer on a lower temperature made the outside a little crunchier.
- Brushing the top with milk before cooking gave them a nice brown colour. Without it they look a bit pale. I also tried brushing the top with egg but found this made the top a bit tough and shiney.
I also found that I needed to up the level of sugar and milk slightly from my basic recipe to get the perfect scone flavour and texture.
One thing that everyone seems to be in universal agreement about is that you should handle the dough as little as possible. The more you work it, the more you’ll build up the gluten in the flour and you’ll end up with a tough scone. So why am I telling you all this? Why not just get on with the recipe? I’ve added all this just in case for some strange reason you disagree with me about what makes the ultimate scone! In that strange scenario, hopefully this might give you an idea of what you can change to make YOUR perfect scone.
Taste testing all those scones
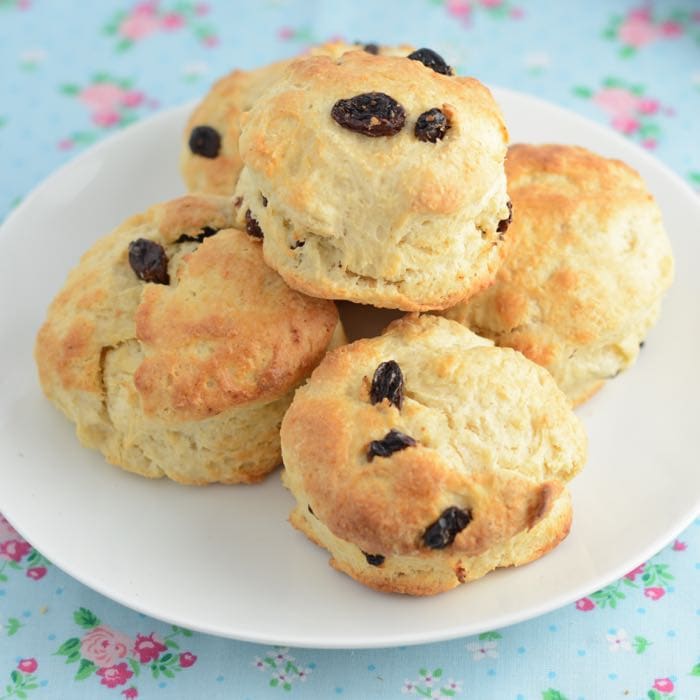
My taste testing in this experiment was eagerly assisted by my family. My son declared them all delicious which wasn’t overly helpful but lovely to hear. The only other non positive feedback I received was a request for a fruit version with raisins.
So just for them, I’ve included a fruit version too…
Even more varieties
If you’re feeling adventurous and want to branch out from traditional plain or fruit scones then take a look at my scone recipes index. It’s full of creative flavours, including savoury, vegan and even a Christmas version with brandy, mincemeat and marzipan.

Recommended Equipment
To make my perfect scones you will need…
- A large bowl
- Weighing scales
- Teaspoon
- Measuring jug
- Round cutter – I use one which is 6cm in diameter, but if you’re having a dainty afternoon tea you could make them smaller. Just note that they might cook a little faster.
- Baking tray
- Silicon baking sheet (optional)
- Cooling rack
FREE GRAMS TO CUPS CONVERSION CHARTS
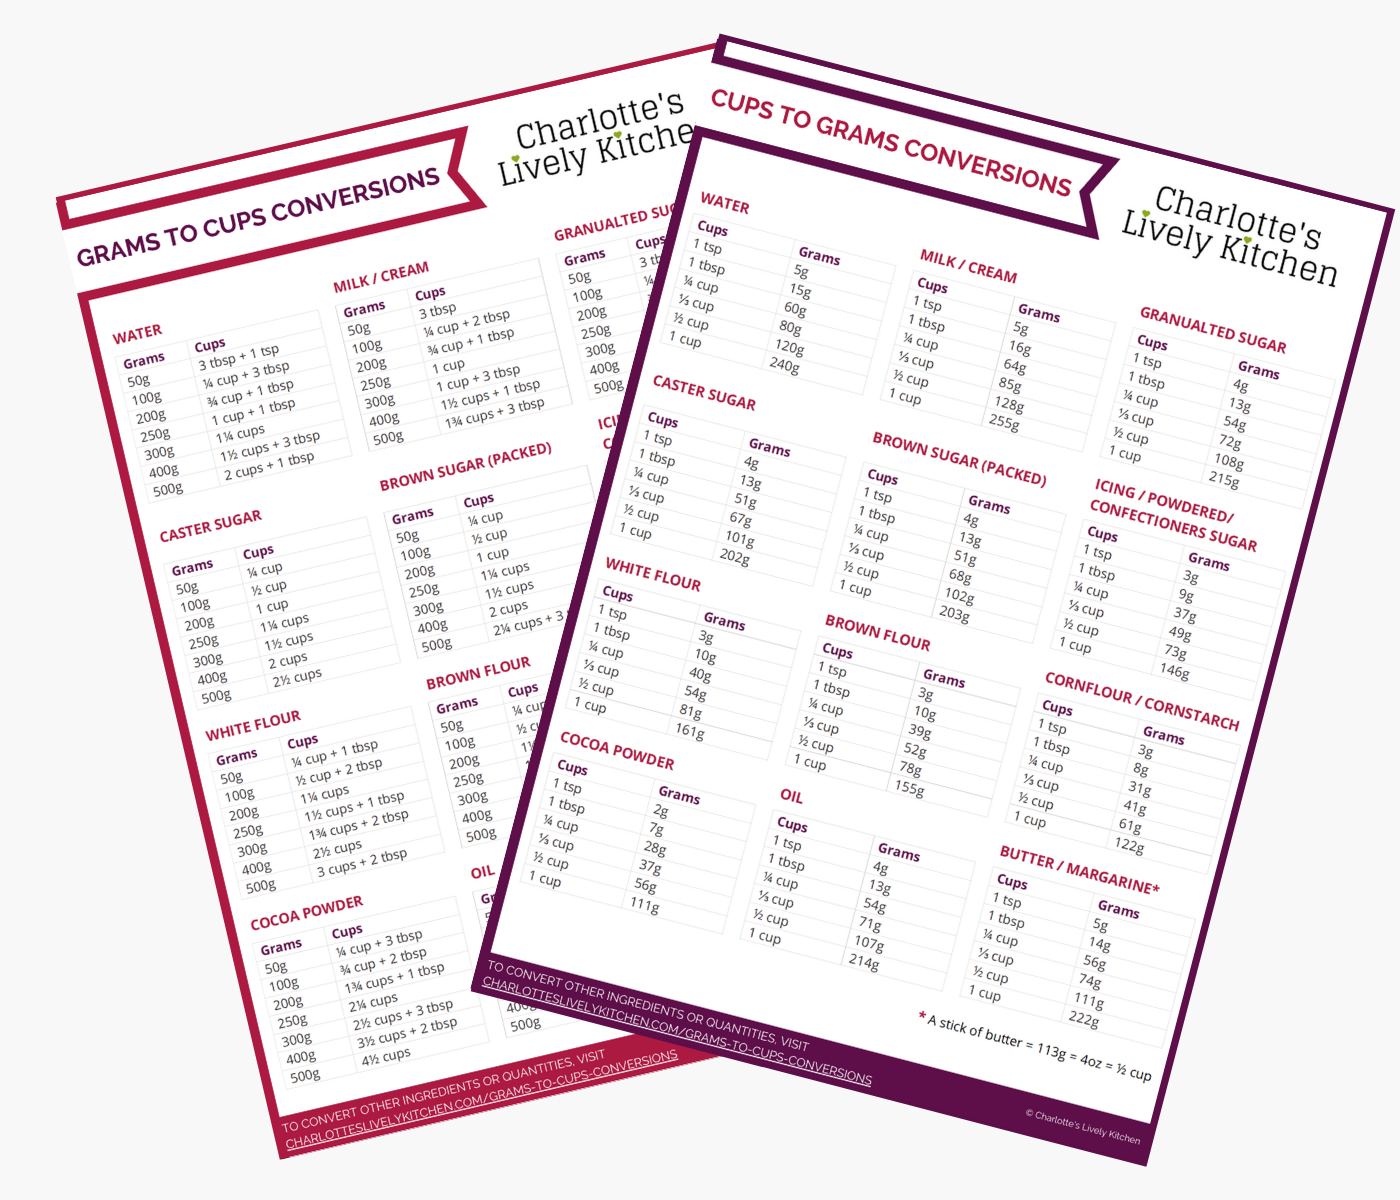
Subscribe to the Charlotte's Lively Kitchen mailing list to get your FREE printable grams to cups and cups to grams conversion charts for twelve popular baking ingredients

Scones (The Perfect Afternoon Tea Treat)
INGREDIENTS
- 500 g self-raising flour
- 100 g unsalted butter + a little extra for greasing
- 60 g caster sugar
- 1 tsp baking powder
- ½ tsp salt
- 275 ml full-fat milk + a little extra for glazing
For fruit scones you'll also need...
- 100 g raisins
- 100 ml water
INSTRUCTIONS
- If you're making fruit scones then put the raisins (100g) and water (100ml) into a bowl and leave to soak for 20 minutes - soaking the fruit helps to prevent it burning during cooking.
- After 20 minutes, drain the water from the raisins and put the raisins to one side until needed.
- Pre-heat the oven to 220ºC/200ºC fan.
- Lightly grease a baking tray with butter (if you're using a silicon baking sheet this isn't necessary)
- Put the self-raising flour (500g) into a large bowl. Cut the butter (100g) into cubes, and add it to the flour.
- Gently rub the butter into the flour using your fingertips, until it is the consistency of breadcrumbs.
- Add the caster sugar (60g), baking powder (1 tsp), salt (½ tsp) and raisins (if using) and mix to combine - Sprinkle the salt and baking powder across the top of the flour/butter mix rather than putting it in one place as this will help ensure that it's evenly distributed.
- Make a well in the centre and add the full-fat milk (275ml) - I like to keep a tablespoon or two back to add at the end to help collect up any stray bit of flour.
- With as little action as possible, mix the milk into the dry ingredients using your hands until it has come together into a ball of dough. If there's any flour left in the bottom, add a touch more milk to help collect it up - your dough should be slightly sticky, but not too sloppy.
- Place the dough on a work surface and pat it flat to a thickness of about 1½ inches (don't use a rolling pin). Use the cutter to cut circles and place them on a baking tray. After the first set, quickly ball up the dough, pat flat, and repeat until you have used up all of the dough.
- Glaze each scone with a little milk and place into the oven for 12-15 minutes until they are cooked (I tap them to see if they sound hollow as you do with bread, or if I've got a little leftover dough, I'll put that in the oven with the scones and use it as a test to see if they're done).
- Once cooked, remove from the oven and leave to cool on a cooling rack.
- Serve with butter, jam and clotted cream.
NOTES
NUTRITIONAL INFORMATION
Any nutritional information provided is the estimated nutritional information per serving. Please refer to my guide to Charlotte’s Lively Kitchen nutritional information if you would like to learn more about how this is calculated.
Free From/Suitable For
The ingredients for this recipe are commonly available free from all these allergens. However, please ensure you double-check allergen information for all ingredients.
- Vegetarian
- Egg-Free
- Tree Nut-Free
- Peanut-Free
- Sesame-Free
- Soya-Free
- Sulphur Dioxide and Sulphite-Free
- Fish-Free
- Crustacean-Free
- Mollusc-Free
- Celery and Celeriac-Free
- Mustard-Free
- Lupin-Free
Leave a Reply