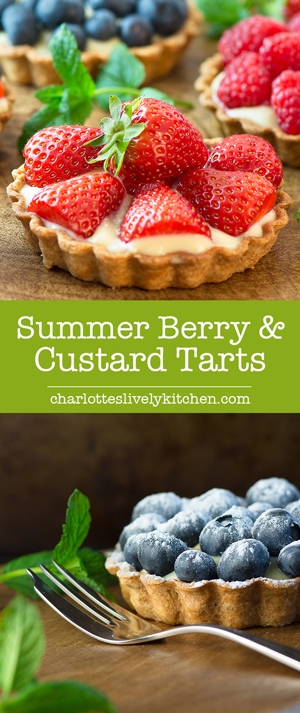
Summer berry and custard tarts – crispy pastry filled with creamy vanilla custard and topped with fresh, juicy berries. A delicious, elegant summer dessert.
I suspect I’ve actually developed a bit of a summer fruit addiction. As soon as I finish one recipe, I’m off to stock up on more for the next one. I should probably figure out to grow them in my garden and save myself a fortune, but sadly I’m pretty much the least green figured person you could meet.
As well as my berry addiction I also seem to have developed somewhat of a food photography addiction, especially when it comes to the summer berries and I think I may have got a bit carried away with this one. So I have decided today’s post is going to be full of pretty pictures of summer tarts as I can’t narrow them down to my favourite few. I hope you enjoy them. If in fact you don’t want to go through all of my pretty pictures then you can always skip straight to the recipe and get cooking now (although if you want an extra tip for rolling out pastry more easily or a grown-up twist for the recipe then make sure you keep on reading).
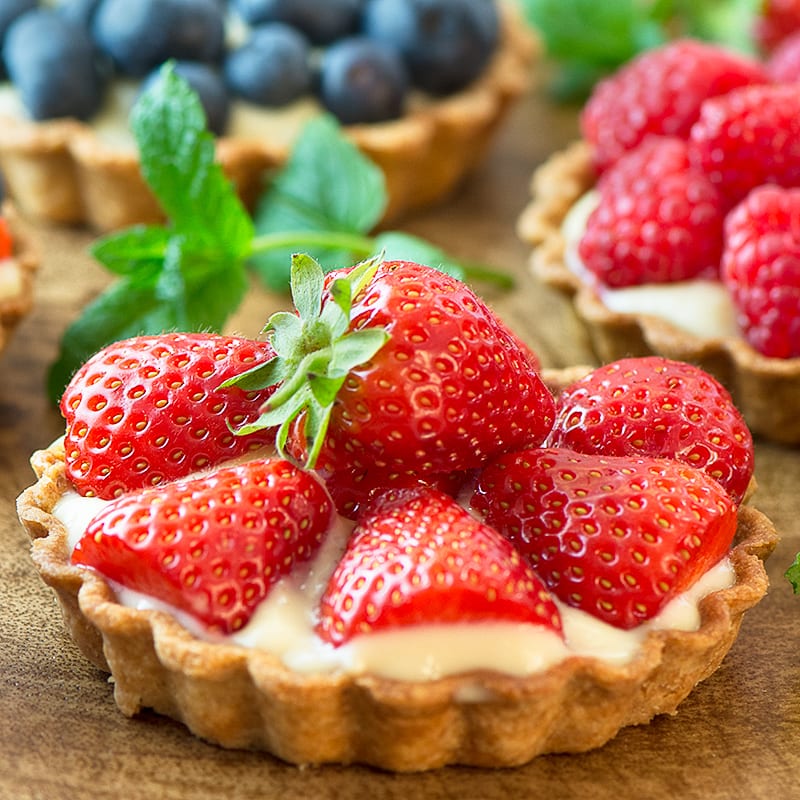
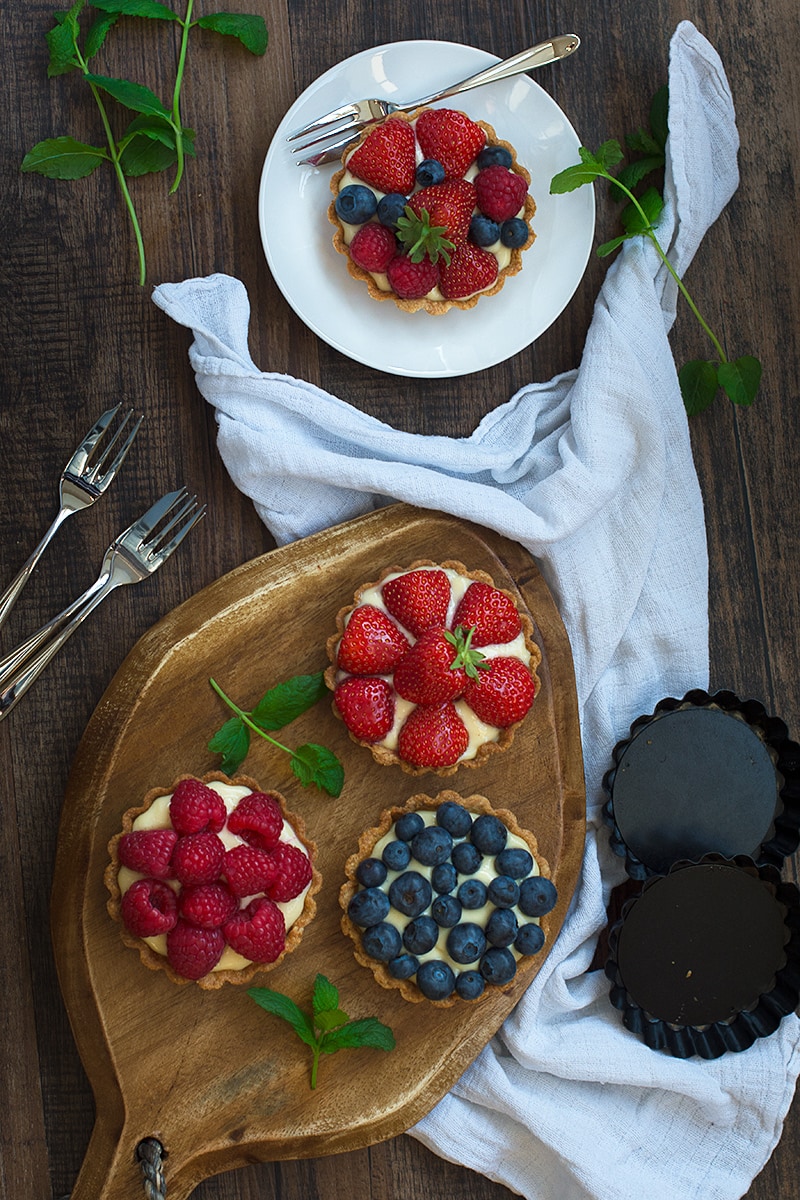
My favourite picture
For the main picture for this post, I most liked the strawberry one at the top as it shows a whole range of fruits that can be used to fill the tarts. But this blueberry tart sprinkled with icing sugar was a really close contender…
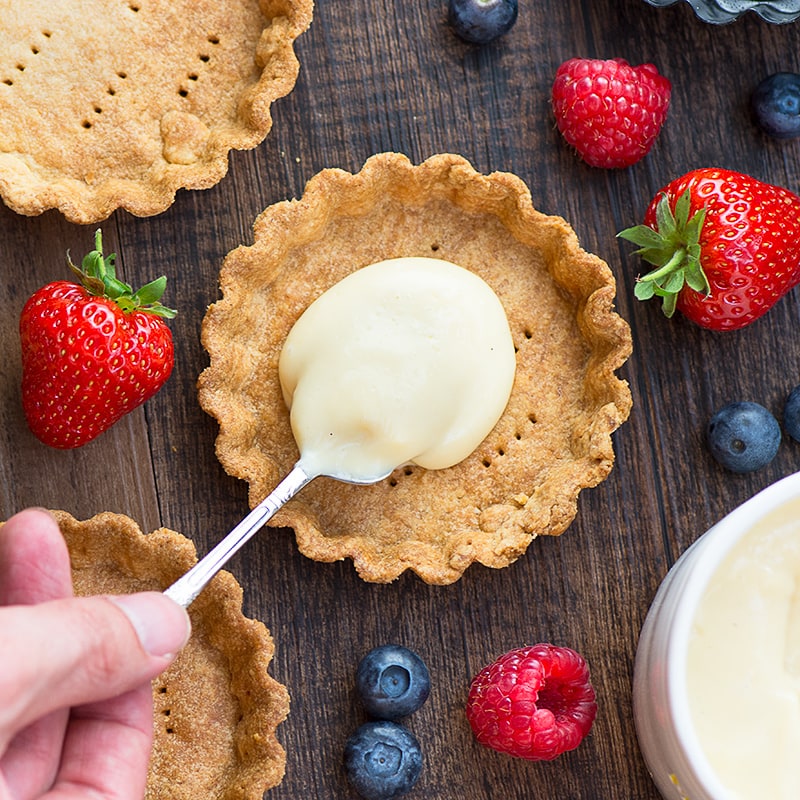
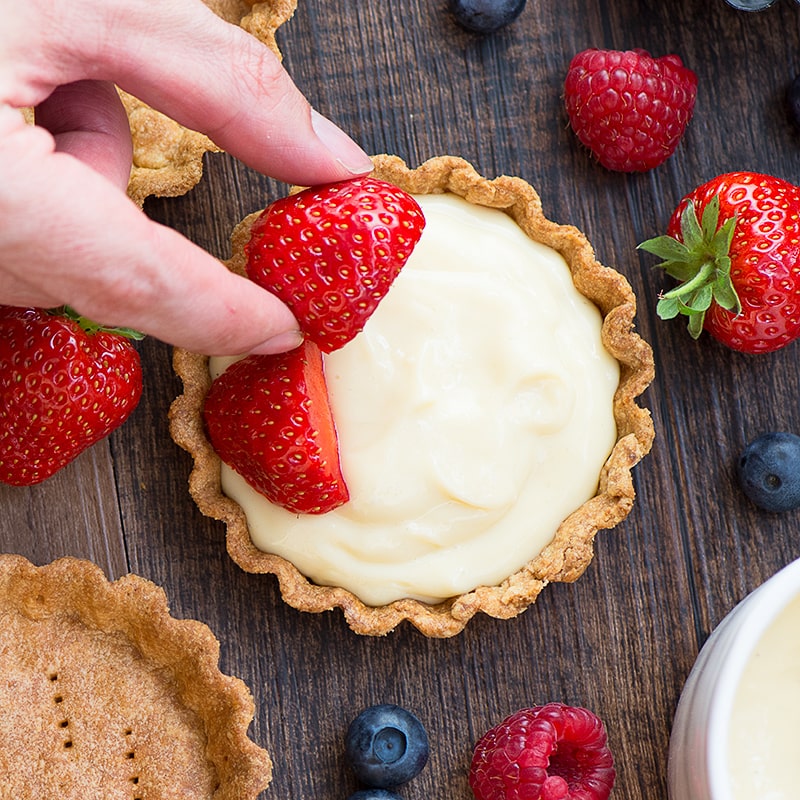
The action shots
I absolutely love “action” shots with people cooking but I don’t often try them as I’m normally photographing alone (by alone I mean with a two year old and four year old under my feet). When the opportunity to employ a hand model shows up, I make sure to make the most of it!
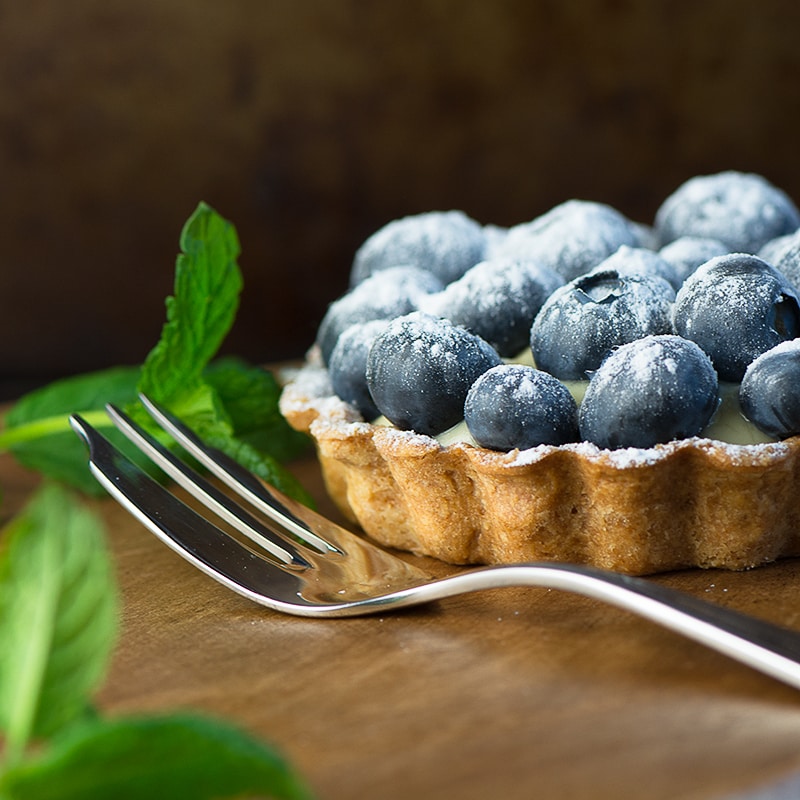
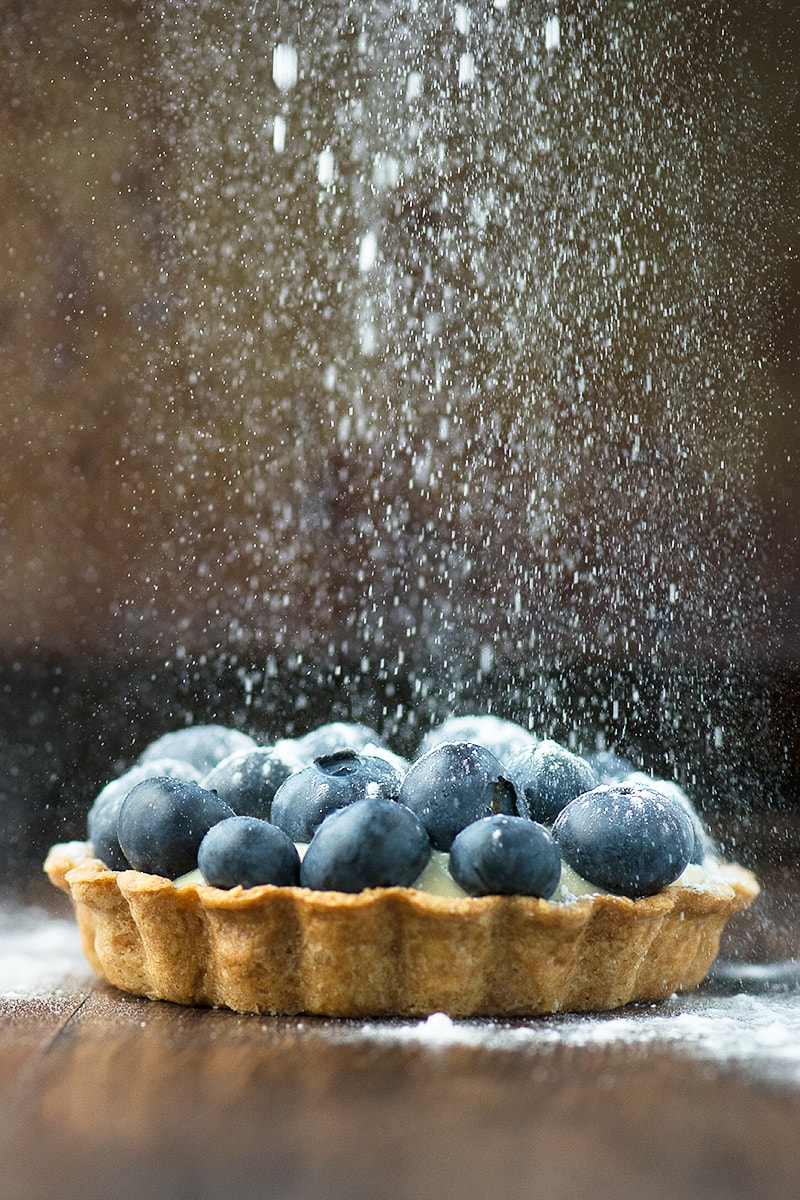
The icing sugar shot
Another shot I’ve been eager to try for a while is sprinkling icing sugar. I was pretty pleased with my first attempt although I’d like to get the icing sugar more defined in future. This requires a much faster shutter speed but we didn’t really have enough light to speed it up any more. Next time I’ll have to wait for a dry, still day and try heading outside. I just hope my neighbours aren’t watching out of the window or they’ll think I’m a little crazy.
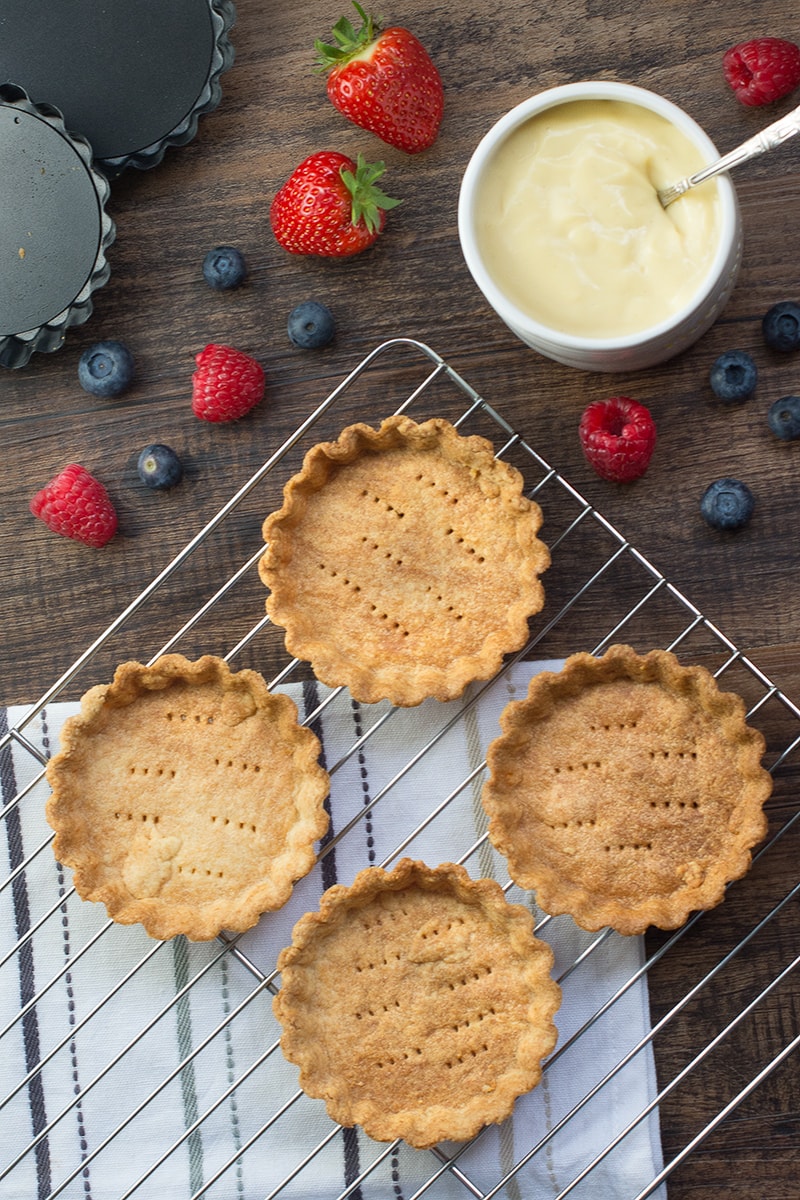
A little trick to make rolling out pastry a bit easier
Before I get on with the recipe there’s a little tip I want to share to help making these tarts a little easier. I’ve mentioned it before in my post about mince pies, but it’s even more useful here as the pastry needs to be thin otherwise it’ll overwhelm the flavour of the custard and berries.
I don’t know about you but I tend to find that my pastry has a horrible habit of sticking to the rolling pin. If it starts doing this I simply put it between two sheets of clingfilm and roll on top of that. The cling film then peels off easily leaving you with perfectly flat pastry.
When I’m making tarts like this I tend to roll out the pastry one tart at a time, as it’s thin it can be easy to poke a hole in it while you’re transferring it to the tin. I peel off the top layer of cling film and the lift the pastry up still on the bottom sheet and carefully flip it over into the tart tin. The clingfilm helps to hold it together so that it makes it into the tin in one piece.
Don’t worry if you make a hole (unless it’s huge in which case screw it up and roll it out again). You’ll actually need to make some small holes in the pastry to let out any air while it’s cooking and if it’s a little bigger you can always patch it up with a little leftover pastry.
A little grown up twist
If you have any pimms to hand this tastes delicious mixed in with the custard just before you fill the tart. Stir it in a little at a time and have a little taste as you go until the flavour is just right.

FREE GRAMS TO CUPS CONVERSION CHARTS

Subscribe to the Charlotte's Lively Kitchen mailing list to get your FREE printable grams to cups and cups to grams conversion charts for twelve popular baking ingredients

Summer Berry and Custard Tarts
Equipment
- 8 individual tartlet tins - Loose bottomed tins are best so the tarts pop out easily and I've never had a problem with the pastry sticking.
- A couple of large bowls
- Weighing scales
- Rolling Pin
- Cling film
- Fork
- Wire cooling rack
- Measuring jug
- Small-medium sized saucepan
- Whisk
INGREDIENTS
For the pastry
- 275 g plain flour
- 40 g caster sugar
- 125 g unsalted butter
- 1 medium egg
- A little vegetable oil to grease the tins
For the custard
- 600 ml full fat milk
- 8 egg yolks
- 60 g caster sugar
- 60 g plain flour
- 1 tbsp vanilla extract - this may seem like a lot, but unless the custard has a strong vanilla flavour it will become lost alongside the pastry and berries
To serve
- 8 handfuls of summer berries - the exact weight depend on the berries you're using. For example, 350g strawberries.
- A sprinkling of icing sugar - because it looks pretty
INSTRUCTIONS
Make the custard
- Put the full-fat milk (600ml) into a saucepan and heat very gently until warmed but not quite boiling.
- Meanwhile, separate 8 eggs, putting the yolks into a large bowl (you can freeze the egg whites to use another day if you don't need them).
- Add the caster sugar (60g) to the egg yolks and whisk until combined.
- Add the plain flour (60g) and vanilla extract (1 tbsp) to the egg yolks and whisk until combined.
- Once the milk is warm, remove it from the heat and gradually add it to the other ingredients a bit at a time, whisking in each addition of milk thoroughly before adding more.
- Once combined, put the mixture into the pan and return to a very gentle heat. Continue to cook, whisking constantly until the custard is thick. You want the custard to be much thicker than you would use for pouring on a dessert, as you move your whisk it should leave a clear trail that doesn't immediately disappear. You must keep the custard moving constantly to avoid it burning or going lumpy.
- Once the custard has thickened pour it into a bowl or jug and cover with clingfilm. It's important that the top of the custard is in full contact with the clingfilm to prevent a skin forming while the custard cools.
- Chill in the fridge for a couple of hours.
While the custard is chilling make the pastry
- Sift the plain flour (275g) into a large bowl.
- Add the caster sugar (40g).
- Cut the butter (125g) into cubes and add to the bowl.
- Rub the butter into the dry ingredients until it resembles breadcrumbs - I find this easier to do if I have cold hands as it helps to keep butter firmer.
- Once the mixture is the consistency of breadcrumbs, add the egg to the mixture.
- Mix the egg into the mixture and them bring it together with your hands - if it seems a bit dry knead it a few times until it comes together. Be careful not to over knead the pastry as this will make it less tender to eat.
- Wrap the pastry in clingfilm and put into the fridge to chill for half an hour.
Cook your pastry
- Preheat the oven to 200ºC/180ºC fan.
- Lightly grease the tins with a little vegetable oil
- Remove the pastry from the fridge and roll it out until it is very thin (you should be able to see the shadow of your hand through it if you hold it underneath) and slightly larger than the tin (I find about 1x the size of the base + 2x the sides of the tin about right. I find it easier to roll out the pastry for each tart individually. If you have trouble with the pastry sticking to the rolling pin/board have a quick look at my extra tip above.
- Gently lift the pastry into the tins and ease it into the edges so that it is in complete contact with the tin.
- Trim off the excess pastry at the top of the tin using a sharp knife or rolling your rolling pin across the top.
- Use a fork to prick holes across the bottom and up the sides of the pastry - it's essential that the holes go all the way through the pastry as this allows the air to escape while it cooks. If you don't do this you'll find that your pastry domes up at the bottom and the sides collapse.
- Place the tins on a baking tray and put in the oven for 12-14 minutes until just golden.
- Once cooked, remove from the oven. Leave the tart shells in their tins for at least 10 minutes after removing from the oven to allow them to harden a little. Remove them from the tins and leave them to cool fully on a wire rack.
Build the tarts
- Evenly distribute the custard between the tart shells and top with the summer fruit of your choice.
- Finish with a sprinkling of icing sugar.
NOTES
NUTRITIONAL INFORMATION
Any nutritional information provided is the estimated nutritional information per serving. Please refer to my guide to Charlotte’s Lively Kitchen nutritional information if you would like to learn more about how this is calculated.
Free From/Suitable For…
- Suitable for Vegetarians
- Nut-Free
- Corn-Free
- Soy-Free
The ingredients for this recipe are commonly available free from all these allergens. However, please ensure you double-check allergen information for all ingredients.
Rosemary says
Is there any reason I can’t used a tin of good quality chilled, and ready made custard?
Charlotte Oates says
No, you absolutely could.
Rose says
Hello:) I really want to try this recipe butI’m new at baking and every time I make custard it’s smooth unti I put it in the fridge to cool. It turns extremely thick and not at all how it is in a bakery. Do you have any suggestions what I am doing wrong? Thank you!
Charlotte Oates says
Are you using my custard recipe or a different one? The custard will thicken as it cools, you could try making it less thick in the first place. Alternatively if you find it’s thickened too much in the fridge and you want to use it later you can warm it through and whisk in a little more milk to thin it out.
Leila (A Polyglot Mum) says
Not sure which post to comment on as they all just look amazing but as I love these tarts, I landed here…just stunning, the photos are fabulous and I absolutely NEEEEED to have one of these tarts now….my mouth is watering…. #tastytuesdays
Charlotte Oates says
Thanks Leila. I really enjoyed photographing these tarts so I’m glad you like them.
Cathy Glynn says
These look divine and such beautiful photos x
Charlotte Oates says
Thanks Cathy. I was really pleased with how the photos turned out, I may have got a bit carried away when I was taking them!
Rick says
Definitely a toss up between the first 2 shots.
Charlotte Oates says
Yes, but which is your favourite? 🙂
Honest mum says
Wow they look utterly divine, I thought I’d be healthier come summer but I have developed such a sweet tooth, running for 60 minutes a day to make up for it but I want one of these now. Thanks for linking up to #tastytuesdays x
Charlotte Oates says
I’ve developed the sweet tooth without the running to offset it – the summer berries are just too tempting to bake with at this time of year!
Kirsty Hijacked By Twins says
These look delicious me wow your photographs are stunning x #cookblogshare
Charlotte Oates says
Thanks Kirsty. I’ve been working really hard at my photography so I’m glad you liked them.
I hope you’re enjoying your new hosting job. You seem to be doing a fab job so far xx
lili says
Lovely post, with great tarts, photos and tips. Your pastry cases look really precise too! In the mood for fruit tart now! 🙂
Charlotte Oates says
Thanks Lili. I’m always in the mood for a fruit tart!
Lucy @ BakingQueen74 says
These look so pretty! Visiting from #CookBlogShare. (Don’t forget to link up to Perfecting Patisserie, I just spotted the badge but it ends tonight, just in case you had forgotten)
Charlotte Oates says
Thanks for the reminder. I’d meant to do it on Sunday night and got sidetracked.
Lucy @ BakingQueen74 says
That sounds familiar….. Thanks for adding the link,these look heavenly.
Hayley @ Snap Happy Bakes says
Love the icing sugar shot! And I’d agree with you I think your choice of the main picture fits better! The blueberry one doesn’t look as summery! I am now drooling after looking at all the delicious looking fruit tarts! Thanks for linking #CookBlogShare
Charlotte Oates says
Glad you agree with me 🙂 he was very smug yesterday after seeing a tweet on his side!
Steph @MisplacedBrit says
WOW!
So so cute, fresh, delicious summer treats.
Love the photo of the falling icing sugar x
Charlotte Oates says
Thanks Steph. I love trying out “action” shots with food. I’m definitely going to try that one again in future.
Alison says
How beautiful these look, totally gorgeous
Charlotte Oates says
Thanks Alison x
Dawn says
These look great. Fantastic photos x
Charlotte Oates says
Thanks Dawn x
Hannah Hossack-Lodge says
Beautiful! You can’t beat a fresh fruit tart. And I love the shot of the icing sugar being sprinkled, I need to get a bit more creative with my photography and try some action shots.
Charlotte Oates says
Thanks Hannah. Your still photography is brilliant so I look forward to seeing what you do with your action shots.
Thalia @ butter and brioche says
I love how easy and simple these tarts are.. and how you can choose which seasonal fruits to top them with. Delicious.
Charlotte Oates says
I love flexible desserts like this too, I tend to choose whatever fruit catches my eye at the shop.
Sophie @ Mum, M & More says
Great tips, beautiful photography and amazing recipe! #yummy! #sundaysweets
Charlotte Oates says
Aww thanks Sophie x