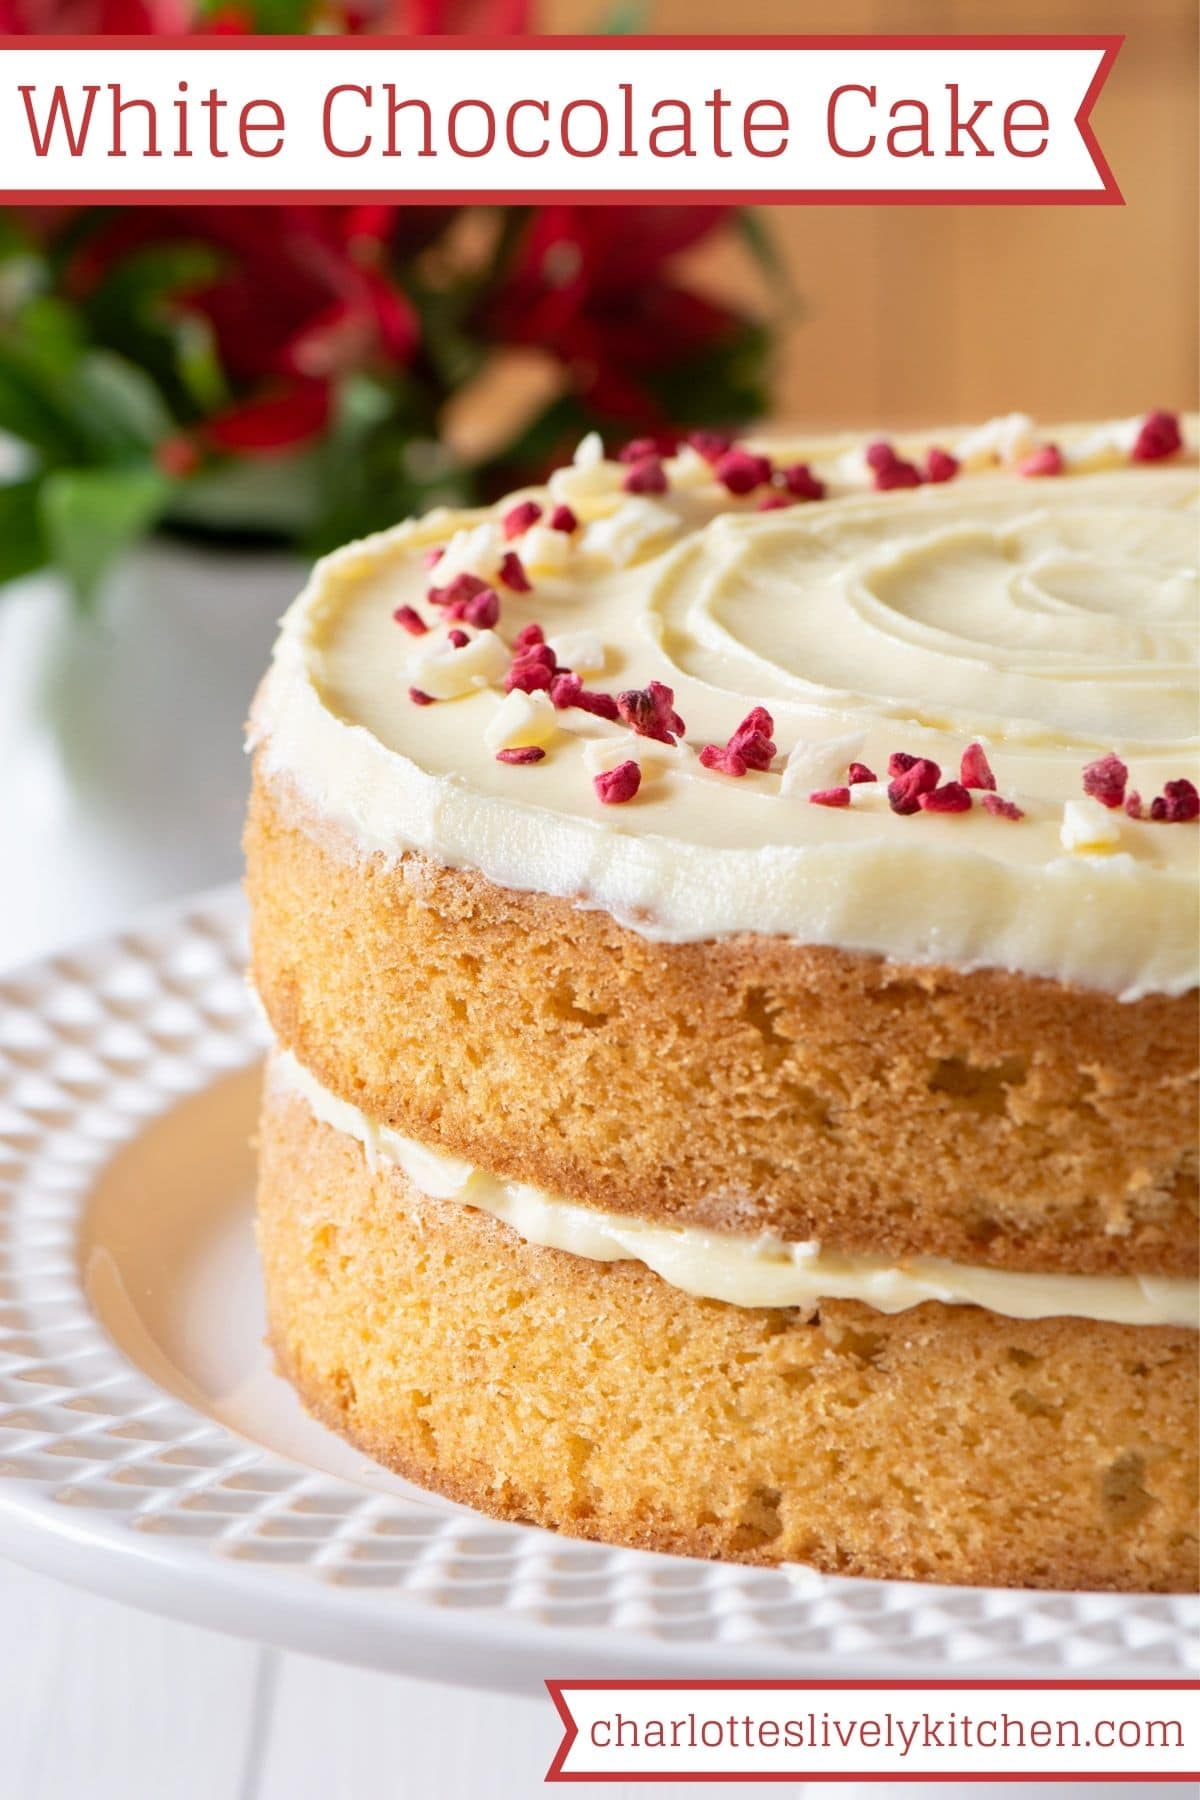
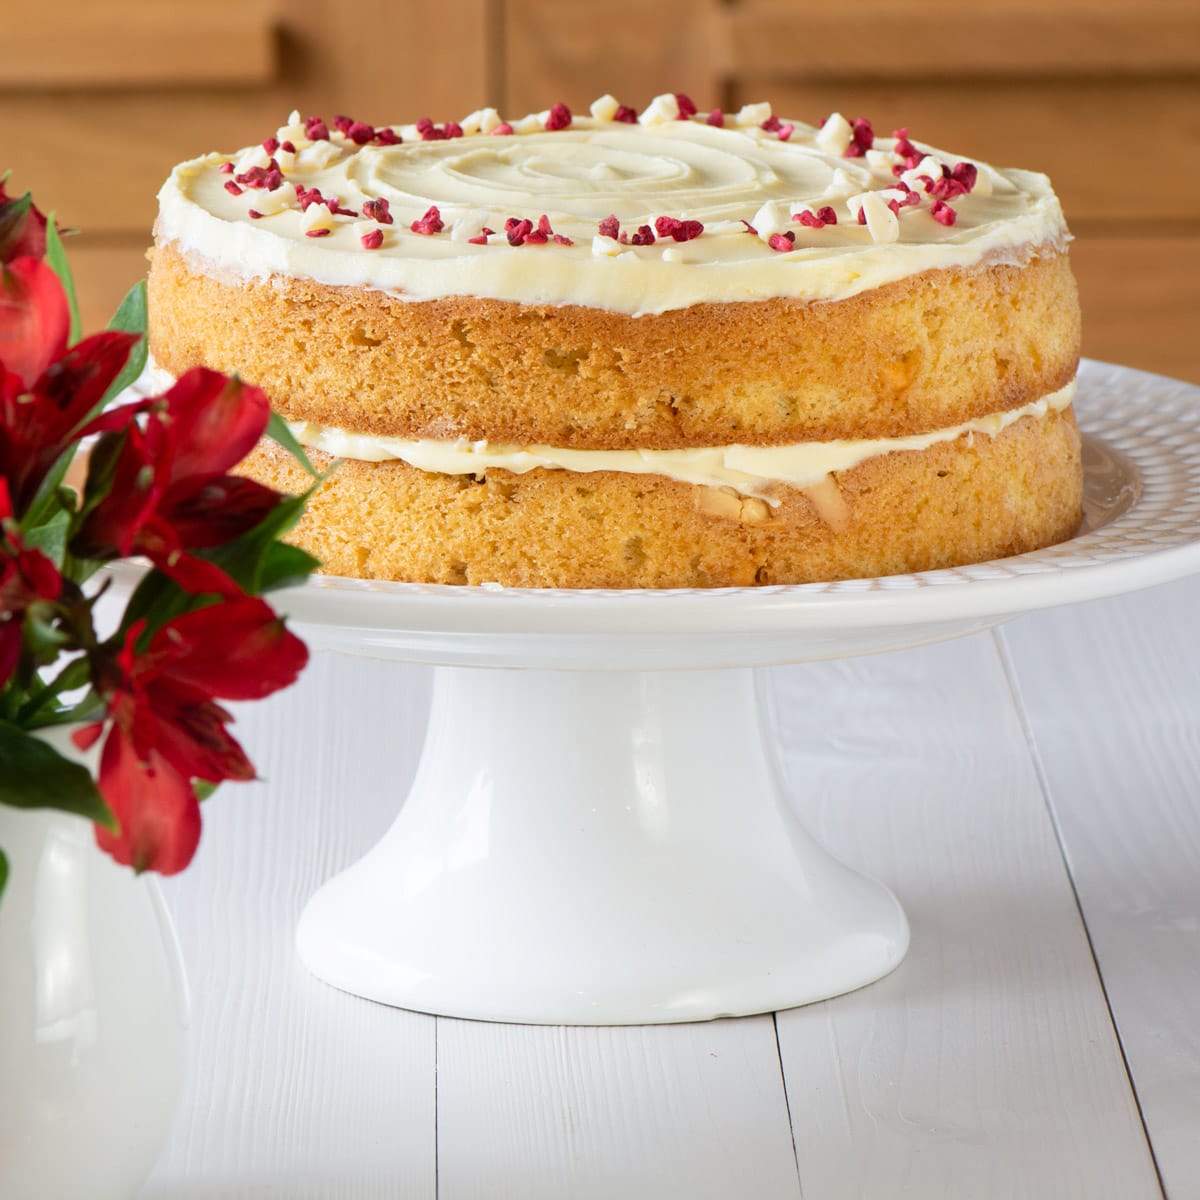
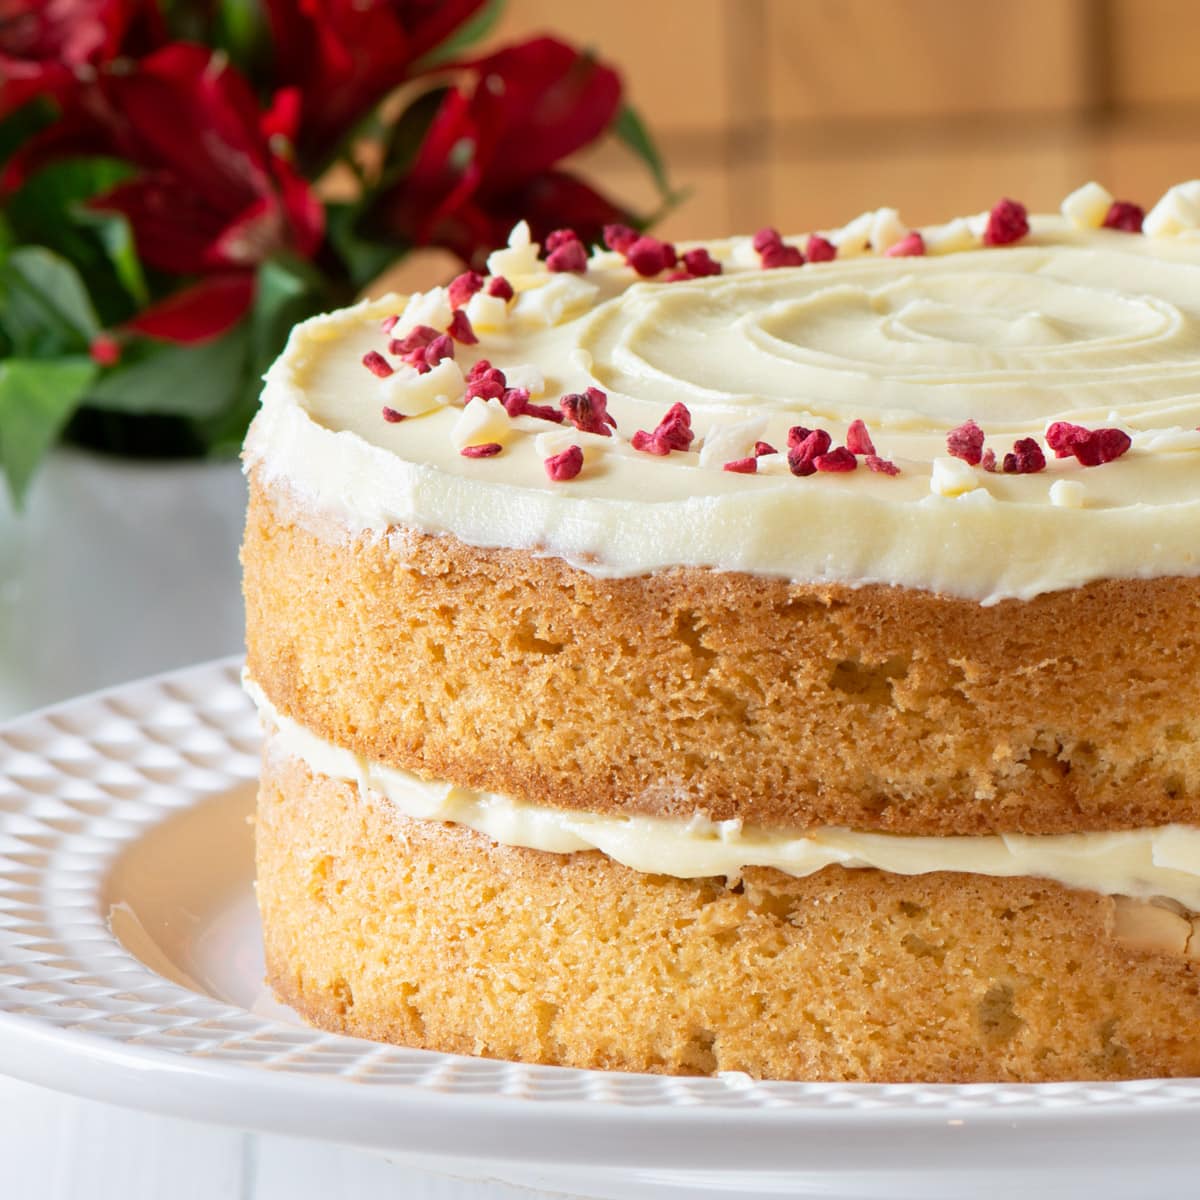
White chocolate cake – A delicious, soft sponge cake packed full of white chocolate chips and topped with smooth white chocolate buttercream.
Skip to the recipe | Recipe FAQs
One question I’m asked quite regularly is how to tweak my chocolate cake recipe to make a white chocolate cake.
To take out the guesswork, I decided to get into the kitchen and start testing.
It turned out that simply switching the milk chocolate in the chocolate cake for white wasn’t going to cut it. When I tested it I ended up with a cake that lacked flavour, sank in the middle and had an odd texture – definitely not something I’d be happy to share with you all.
In order to create a cake that’s packed full of white chocolate flavour and has the delicious soft sponge you all seem to love I had to start from scratch and design something completely new.
I know some of you like to understand why I do different things in different cakes – it always surprises me how carefully some of you go through my recipes spotting subtle differences and asking about them. If you like that detail then keep reading.
Otherwise you skip to the frequently asked questions and answers to help you make the most of out the recipe or you can jump straight to the recipe.
The story of this cake
One of the biggest challenges I had with this cake was filling it with white chocolate flavour. White chocolate is much more subtle that its darker cousins so you need more of it. Also, rather than the chocolate being melted or grated into the cake mixture (as I do with my regular chocolate cake) it needs to be in bigger chucks.
The addition of white chocolate chunks/chips presents a new challenge – creating a sponge that’s light and fluffy, but at the same time having enough structure to hold the chocolate chips. Many websites recommend tossing the chips in a little flour prior to adding them to the cake mixture. That is definitely useful (and something I recommend in this recipe), but alone is not enough to keep them suspended in the cake if they really want to sink to the bottom.
This led me to a complete redesign of my sponge and has resulted in a whole new cake that has the same great texture and flavour as all of my other sponge recipes, but is also capable of holding those white chocolate chips right where they should be.

So, how does this sponge recipe differ from my usual cake recipes?
More flour
To suspend the chocolate chips in the cake it needs more structure and a great way to add structure is to increase the amount of flour.
Switching from using the all-in-one method to the creaming method
However, increasing the amount of flour can lead to a cake that’s dense and heavy. To counter this, I switched from my usual all-in-one method (where I chuck everything in one bowl at the same time and mix), to the creaming method.
Using the creaming method, the butter (or margarine) and sugar are beaten together and then the eggs are slowly added. This method adds more air into the cake mixture, helping to give the sponge a good rise and make it light and fluffy.
Increasing the cooking temperature and reducing the cooking time
Increasing the cooking temperature means that the cake sets more quickly giving the chocolate chips less time to wander down through the cake. To ensure the cake doesn’t dry out, the cooking time is shorter than you will see for many of my other recipes for cakes of the same size.
Sprinkling the chocolate chips in a little flour
This is a well known method for helping bits in cake to stay put. As a bonus, to help this work even better, I pop the chips into the microwave for 10 seconds before tossing them in the flour. This 10 second burst is enough to make the outside of the chips a little tacky (but still solid, defined lumps) which helps the flour to stick.
Sprinkling some of the chocolate chips on top of the cake mixture
When I make this cake I mix most of the chocolate chips into the cake mixture. However, I like to keep back roughly one third to sprinkle on top of the cake before it bakes. This helps to give the most even distribution of chocolate chips in the sponge. You will find that this gives the top of your cake a rather uneven finish (as the cake rises around the chips), but once you’ve added your buttercream you won’t notice.
If you’d rather have a smoother finish to your cake, you can mix all of the chocolate chips into the cake mixture, but be warned, you’re likely to end up with a slightly less even distribution.

Switching some of the eggs for yogurt
For a 20cm sponge I’d usually use four eggs. However, in this recipe I’ve switched out some of the eggs for natural yogurt. When I tested this recipe using just eggs the chocolate chips fell through the cake and ended up in a (rather delicious) layer at the bottom. However, switching out half the eggs for yogurt helps to suspend them in the cake.
I’ve tried and tried to figure out why this works but I’m yet to discover the secret. I had originally thought it was down to the relatively density of eggs and yogurt, but they’re almost identical so it’s not that. Any genius suggestions in the comments would be most welcome as I love to really understand what’s happening when I bake.
Adding a little bicarbonate of soda
As I’m using yogurt in this cake, which is slightly acidic, I’ve added a little bicarbonate of soda to give the cake an extra lift.
WHITE CHOCOLATE CAKE FAQS
If it’s your first time making this recipe or you have a question then please take a moment to have a read through my white chocolate cake FAQs for lots of extra tips, suggested ingredient substitutions (if you need to make any) and allergen information.
- How long does this cake last for and how should it be stored?
- Can this recipe be used to make cupcakes?
- Can this cake be covered in fondant to make a birthday/celebration cake?
- What is the cake decorated with?
- Can I use fat-free natural yogurt?
- I don’t have a microwave, can I still make this cake?
- Can I substitute the white chocolate chips for dark or milk?
- What is this cake free from? Who is it suitable for?
If there’s something you’d like to know that I’ve not answered here then please let me know in the comments.
How long does this cake last for and how should it be stored?
This cake will last for up to a week stored in an airtight container.
❄️ Suitable for freezing
This cake is also suitable for freezing, either just the sponges or the buttercreamed cake (minus any sprinkles).
To freeze just the sponges, I recommend wrapping them in clingfilm to protect them and then freezing.
To freeze the finished cake, either:
- Pop it into a freezer-safe airtight container or
- Put it into the freezer uncovered for a couple of hours (until the buttercream is firm) and then wrap the cake in clingfilm.
If you take the second approach, I’d recommend removing the clingfilm before the cake has defrosted as that’ll help to keep your buttercream neat.
I would recommend eating this cake when it’s freshly made rather than freezing it. It freezes well, but we found the chocolate chips were a bit firmer after it had been defrosted and preferred the texture before freezing.
Can this recipe be used to make cupcakes?
Yes.
The mixture is enough to make 16 cupcakes. As they’re smaller they’ll only need to be baked for approximately 18 minutes rather than the 25 recommended in the recipe.
Can this cake be covered in fondant to make a birthday/celebration cake?
Yes.
The sponge is firm enough to support a layer of fondant.
What is the cake decorated with?
How you choose to decorate your finished cake is up to you, but I’ve used a sprinkling of freeze-dried raspberries (to add a bit of colour) and some white chocolate shavings.
Can I use fat-free natural yogurt?
I wouldn’t recommend using fat-free yogurt as the fat content in the yogurt helps to ensure you get a moist, fluffy sponge. Using a fat-free version may leave you with a sponge that’s a little dry.
I don’t have a microwave, can I still make this cake?
Yes.
In the recipe I recommend popping the white chocolate chips into the microwave for 10 seconds before tossing them in flour and adding them to the cake mixture. The purpose of giving them a very brief blast in the microwave is the make the outsides ever so slightly tacky which helps the flour to stick. This in turn helps the chocolate chips to remain suspended in the cake.
The recipe will works perfectly well without this little blast in the microwave, however you may find the chocolate chips are a little more likely to sink during baking.
Can I substitute the white chocolate chips for dark or milk?
Yes.
I’ve designed this cake as a white chocolate cake, but any type of chocolate chips will work equally as well.
What is this cake free from? / Who is this cake suitable for?
The ingredients I used to make this recipe are all free from the following allergens. However, please check any labels carefully for allergens you need to avoid as brands can vary, and product recipes can change over time.
- Suitable for Vegetarians
- Tree-Nut Free
- Peanut-Free
- Sesame-Free
- Sulphite-Free
- Lupin-Free

White Chocolate Cake
INGREDIENTS
For the white chocolate sponge
- 240 g self-raising flour - plus an extra ½ tsp of flour to mix with the chocolate chips
- 200 g margarine or butter - if you're using butter, make sure it's soft and at room temperature
- 200 g caster sugar
- 2 large eggs
- 80 g full-fat natural (or greek) yogurt
- ½ tsp bicarbonate of soda
- 200 g white chocolate chips - or finely chopped white chocolate
- ¼ tsp vanilla extract
For the white chocolate buttercream
- 175 g butter - soft and at room temperature
- 175 g icing sugar
- 140 g white chocolate
- A little milk - if needed to get the buttercream to the right consistency
INSTRUCTIONS
Make the white chocolate sponges
- Pre-heat your oven to 180°C/160°C fan.
- Line two 20cm round sandwich tins with greaseproof paper or reusable baking liners.
- Microwave your white chocolate chips (200g) for 10 seconds – you want them to be tacky around the edges, not melted.Add ½ tsp of flour to the white chocolate chips and toss the chocolate chips in the flour until they coated in it.
- In a large bowl, cream together the butter/margarine (200g) and caster sugar (200g) until it's light in colour with a fluffy texture.
- In a separate bowl, mix together your eggs (2 large), natural yogurt (80g) and vanilla extract (¼ tsp) with a fork until just combined.Gradually add the egg and yogurt mixture into the butter and sugar. Beat in each addition well before adding more – don't panic if the mixture starts to look a little split (thats' down to the yogurt).
- Add the self-raising flour (240g) and bicarbonate of soda (½ tsp) and fold into the other ingredients.
- Finally add roughly ⅔ of the white chocolate chips and fold them into the cake mixture.
- Divide your cake mixture between the two prepared tins. Use the back of a spoon to spread the cake mixture evenly in the tins. Sprinkle the remining chocolate chips over the top of the cake mixture.
- Bake the cakes for approximately 25 minutes, until a skewer entered into the middle comes out clean.
- Once baked, leave the cakes to cool in their tins for about 10 minutes, before removing them from the tins and putting them on a wire rack to cool completely.
While your cakes are cooling, make the white chocolate buttercream
- Break the white chocolate (140g) and melt it over a bain marie (in a bowl over a pan of simmering water) or in short bursts in the microwave.Once the chocolate has melted, allow it to cool to room temperature (but make sure it's still runny).
- Once the chocolate has cooled, beat together the butter (175g) and icing sugar (175g) until combined.
- Gradually add the melted, cooled white chocolate, beating constantly to combine it with the butter and sugar.
- Check the consistency of your buttercream – it should be a soft, spreadable consistency, but not runny. If the buttercream is a little stiff, add some milk (no more that 1 tsp at a time) until you have the consistency you want.If the buttercream is a little too soft, pop it into the fridge for a short while to firm up a bit.
- Once your buttercream is ready, build your cake. Place one layer of sponge onto your serving dish. Add half of the buttercream and spread it across the sponge – I use a small palette knife. Repeat with the second sponge.Add your preferred decoration – I use freeze-dried raspberries and white chocolate shavings.Enjoy!
NOTES
NUTRITIONAL INFORMATION
Any nutritional information provided is the estimated nutritional information per serving. Please refer to my guide to Charlotte’s Lively Kitchen nutritional information if you would like to learn more about how this is calculated.
Patricia Henderson says
Absolutely fabulous cake. My usual go- to celebration is Charlotte’s easy chocolate cake but this may just beat it. I added some good quality raspberry flavouring to the cake and icing and a layer of raspberry jam along with the butter cream. Thanks so much.