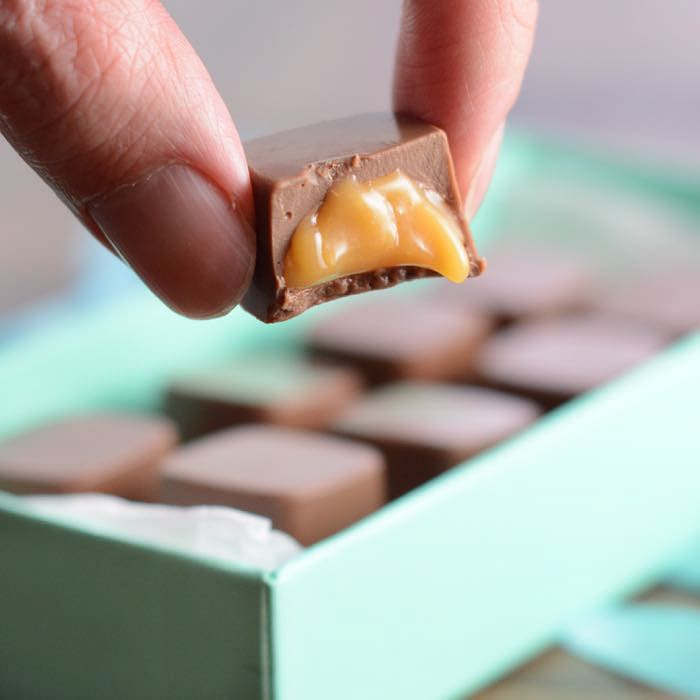
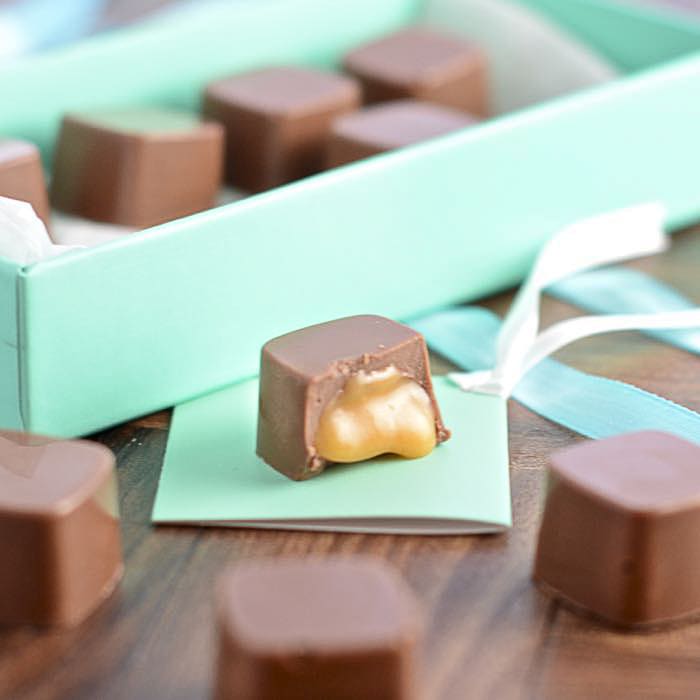
Caramel filled chocolates – Perfect as a gift or simply an indulgent treat for yourself. Find out how to make them yourself with this step-by-step tutorial.
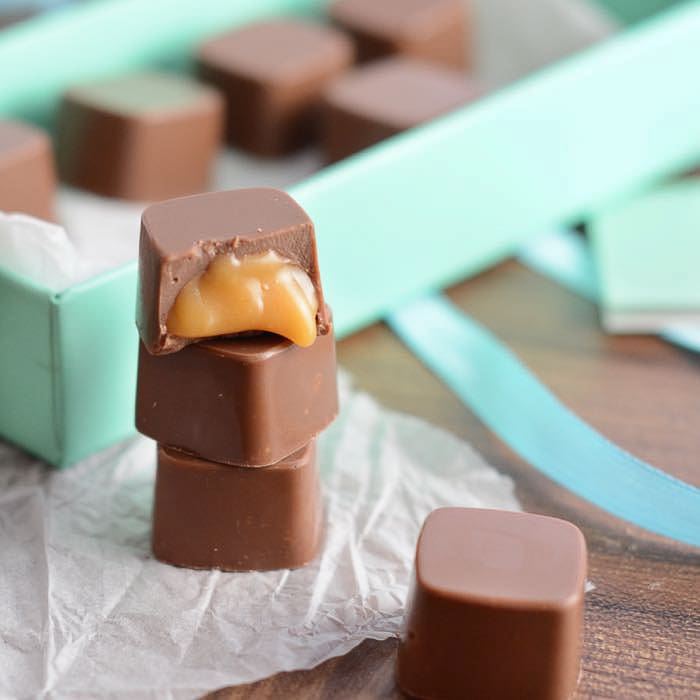
After going on the course I immediately went and raided the Lakeland website for some chocolate making equipment, which included some chocolate moulds.
I decided they would be perfect for some filled chocolates. A while ago I shared my recipe for caramel sauce, which I thought would make a brilliant filling. I made my caramel sauce, which can be done a week or so in advance and stored in the fridge if you want. Alternatively, you could use a store-bought caramel sauce.
You can use the same steps to create all sorts of other filled chocolates, e.g. fondant or ganache. Just make sure that your filling is relatively thick so that the chocolate won’t sink when you pour it over the top to make the base of the chocolate (this would happen if you make something like liqueur chocolates).
How to make caramel filled chocolates
What you need
Good quality chocolate
I used Choceur from Aldi for these (it tastes delicious and is really good value). However, I’ve also used Lindt and Dr Oetker Fine Cook’s Chocolate in the past which also worked very well.
To make 10 chocolates I used a 200g bar of chocolate. This is far more than you need (each chocolate has about 8g of chocolate in it). However, due to the way the chocolates are made it’s much, much easier to do it if you have more than enough chocolate to hand. Don’t worry, the extra chocolate won’t go to waste, you can pour the melted chocolate onto some greaseproof paper, leave it to set, then wrap it up and save it to use again another day.
Chocolate Mould
I use this square chocolate mould from Lakeland, which can be used to make 21 chocolates. They also have swirls, shells and hearts in the same range which would all work well for making these chocolates.
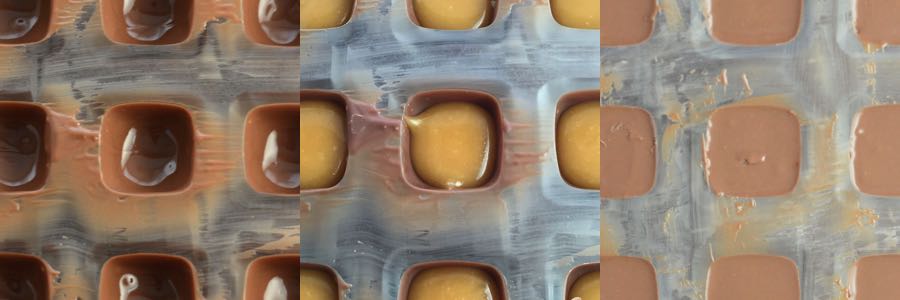
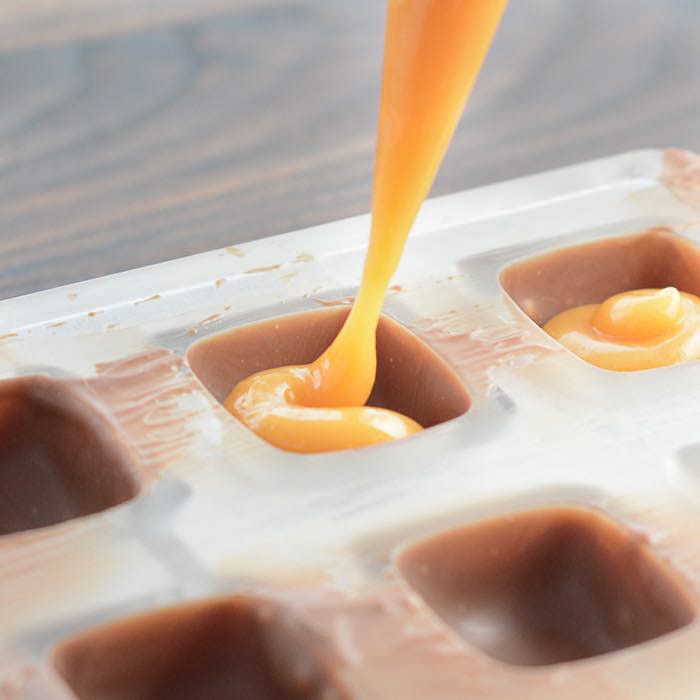
The chocolate mould in use – chocolate shells, then filled with caramel and topped off with even more chocolate
Something to melt the chocolate in
I usually melt mine in a small saucepan directly over a very low heat. However, many websites recommend using a bain marie (chocolate in a bowl over a pan of simmering water). You can also melt chocolate in a microwave, but it’s difficult to control the heat and ensure that the chocolate melts evenly.
If you choose to use a bain marie, then be extremely careful not to get any of the water from the pan into the chocolate, as a single drop can ruin an entire batch.
A cooking thermometer suitable for chocolate
You need to temper the chocolate, to give it its shine and ensure it comes out of the moulds easily (don’t worry, it’s pretty straightforward to do). I prefer to use a thermometer when I’m tempering as it takes any guesswork out and makes it highly likely you’ll get the right results every time.
I use this Thermospatula from Lakeland, which checks the temperature while you stir the chocolate (and it can be used for lots of other things too).
Bowl
To mix the chocolate.
Piping bag
To pipe the caramel into the chocolates. You may also want to pipe the chocolate into the moulds as this is a little less messy than pouring or spooning it in.
FREE GRAMS TO CUPS CONVERSION CHARTS
Subscribe to the Charlotte's Lively Kitchen mailing list to get your FREE printable grams to cups and cups to grams conversion charts for twelve popular baking ingredients

Caramel Filled Chocolates
INGREDIENTS
- 200 g milk chocolate - you won’t actually need this much but it’s much easier if you have more than enough chocolate
- 25 ml caramel sauce - if you’re making this yourself then make sure it’s cooled before filling the chocolates otherwise you’ll melt the chocolate shells.
INSTRUCTIONS
Temper the chocolate (If you're new to tempering chocolate then take a look at my video tutorial just below the recipe)
- Place about half of your chocolate into a small pan over a very low heat (or bain marie if you prefer) and heat the chocolate until it reaches a temperature of 45ºC – Don’t worry if not all of the chocolate has melted, it will continue to melt after it’s removed from the heat.
- Decant the melted chocolate into a bowl and add a piece of the unmelted chocolate you set aside before. Stir the chocolate in until it has melted.
- Keep adding pieces of the unmelted chocolate until the temperature of the chocolate has been reduced to 32ºC. At this point it’s ready to use.
- Remove any lumps of chocolate and set aside to use later – I like to put in onto greaseproof paper as then it’s easy to peel off and use again (it can be difficult to remove hardened chocolate from a bowl).
Fill the mould
- Pour the melted chocolate into the mould (or pipe if you prefer). Fill each of the squares you’re using to the top. Once filled, tip the mould upside down over the bowl you stirred the chocolate in and tip out any excess – you’re trying to create a hollow shell.
- Once the excess has tipped out have a quick check for any holes in the shells (the moulds are clear so these should be easy to spot if you hold it up to the light). If there are any holes then add in a little extra chocolate and tip again to remove any excess.
- Once you’re happy with the shells, use a sharp knife to scrape any excess chocolate from the top of the mould.
- Put the mould into the fridge for at least half an hour to set.
- Scrape any leftover chocolate from the bowl back into the pan you used to melt the chocolate originally (this can then be used to make the base of the chocolates).
- If you haven’t got pre-made caramel sauce then now’s the time to make it. You can find the recipe here.
Fill the shells
- Put your caramel sauce into a piping bag and make a small hole (about 2mm) in the bottom.
- Remove your mould from the fridge.
- Carefully pipe about ½ tsp of caramel sauce into each chocolate. You want to leave a gap of about 2mm at the top of each one for adding the chocolate base.
- Put to one side while you temper the chocolate for the base.
Make the chocolate base
- Add about half of any unused chocolate you have in the packet to the chocolate you put back into the pan earlier and repeat steps 1-4 (above) to temper the chocolate. You can use the same bowl you used earlier even if it has some hardened chocolate in the bottom as it will melt in and help the tempering process.
- Once the chocolate has tempered, spoon or pipe it carefully over the top of the caramel – you want the chocolate to come above the top edge of the mould.Once all of the chocolates are covered, use a sharp knife to scrape off any excess chocolate.
- Put the chocolates into the fridge for at least half an hour to set.
- Once the chocolate has completely set, turn the mould over on a work surface and give it a pretty sharp bang against the edge of the surface (make sure your work surface is not too delicate you don’t want to damage it!) the chocolates should drop out. You might need to repeat this a few times to encourage them all out. If any are being stubborn then pop the mould back into the fridge for a while longer to give them a bit more time to set.
NOTES
NUTRITIONAL INFORMATION
Any nutritional information provided is the estimated nutritional information per serving. Please refer to my guide to Charlotte’s Lively Kitchen nutritional information if you would like to learn more about how this is calculated.
How to Temper Chocolate
If you’re new to tempering chocolate, then I’d recommend you take a look at my video tutorial which shows you the whole process. There’s also a more details post all about it here if you’d like to have a read.
Free From/Suitable For
The ingredients I used to make this recipe are all free from the following allergens. However, please check any labels carefully for allergens you need to avoid as brands can vary, and product recipes can change over time.
- Suitable for Vegetarians
- Gluten-Free
- Egg-Free
- Tree Nut-Free
- Peanut-Free
- Sesame-Free
- Sulphur Dioxide & Sulphite-Free
- Lupin-Free


Kristy says
Not sure what I did wrong but the chocolate did not flow out of the molds when I flipped it. Temps were all correct but this first try was definitely a fail for me.
Charlotte Oates says
Making chocolate is a skill that does require some practice. The brand/type of chocolate you use and the moulds can vary wildly which can affect the results.
Priya says
Hay, please tell how to store thease chocolates…
Charlotte Oates says
They’re best stored in the fridge.
Phillip Pulliam says
Hey Charlotte, Phil here. Question? I have a great recipe for a chocolate filled candy that is already being sold in the UK and doing very well. Right now I make it at home and, it is very labor intensive. Im using small cupcake pans to make a chocolate filled candy. I want to take it to the next level, and mass produce this candy. Do you have any suggestions for mass chocolate candy production at the one man operation level?
Charlotte Oates says
Sadly not, I only make a few at a time as it is quite time consuming. I’m definitely a home baker rather than commercial.
becky cox says
Would it be easier to “paint” the chocolate on with a plastic/silicone brush for the first part of the mold? It seems like it would be messier and have more waste to fill and then dip out chocolate from center? Not that I would know but this is my first time and it just seems like it would be better all around… Unless if they don’t come out from the mold if done that way?
Charlotte Oates says
I’ve not tried painting the chocolate on instead. It should work, although you need to ensure that it’s thick enough to create a solid shell so you might want to do a few coats.
You shouldn’t have any wastage of chocolate from doing it the way shown. The chocolate has been heated, but it’s absolutely fine to use/eat. Collect up any unused melted chocolate in a dish lined with greaseproof paper (so it doesn’t stick once it’s set) and use it next time you need chocolate.
Emma says
What happens if you don’t temper the chocolate?
Charlotte Oates says
The chocolate in the mould won’t set in the same way and is more likely to get stuck in the moulds. It will also have less of a shine.
Stephenie says
These chocolates look amazing… how about I give my mom these as a birthday present? Her birthday is in a few weeks. And I have a question: can i make these chocolates with Nutella.?
Charlotte Oates says
In what way were you thinking of including the Nutella? In addition to/instead of the caramel or mixed with the chocolate. It would definitely work as a filling, it wouldn’t work added to the chocolate as it’s too soft and wouldn’t set properly.
David Paracka says
Yes you can, or buy some praline paste from Amazon
Lizzie Pike says
Hi how long do these last? I want to make them as Christmas presents? Thank you 🙂
Charlotte Oates says
They should be fine for a couple of weeks. I’d keep the refrigerated to help keep them fresh.
Jess says
How long with these lovely little chocolates keep fir at room temp?
Charlotte Oates says
I’d keep them for a few days at room temperature and a couple of weeks in the fridge.
MauiP says
I am a progressing home bonbon maker – very happy to have found your page – hand dipping chewy caramels is a labor – looking to pipe caramel into my molds – how would you say tempered bonbons with this sauce filling at room temperature would last? thank you!
Charlotte Oates says
I’d normally store mine in the fridge and then they should be fine for a couple of weeks. I suspect they’d also be OK at room temperature but personally I’d want get them eaten up in a couple of days if they’re not refrigerated.
Arthi says
Its yummy.. But could you please post the classic home made chocoalte receipe with coco powder? I tried at home but its turning out a sticky one..hard choco bar s not forming
Angela / Only Crumbs Remain says
Wow Charlotte! These would certainly would pass as shop bought treats, but they are so much better because you know exactly what’s gone into them. My mum has a special birthday in the next week or two, and these have caught my eye to try to make as a treat to accompany her main gifts.
Angela x
Charlotte Oates says
If you do decided to make them, send me a picture 🙂
Carrie Christensen says
I used a crockpot set on high with a little water in the bottom and a glass measuring cup set in the water. I’ve been making chocolates for over 5 years and It would take a lot of convincing for me to do it any other way. Your chocolates look wonderful!
Charlotte Oates says
I always think that if you’ve found a way that works well for you then stick with it 🙂
Katy | Her Cup of Joy says
These chocolates are perfectly shaped, like a professionally made chocolate! It looks delicious, especially the caramel!
Charlotte Oates says
Thanks Katy. All credit to the chocolate mould for the perfect shape. I’d really recommend it if you’re thinking of having a go.
Urban Mumble says
These look amazing! I quit sugar a few years ago but have a treat every so often. I think I will have to try to make these. You make preparing them look so easy!
Charlotte Oates says
Thanks. I keep thinking about trying to give up sugar but I can never bring myself to start, there’s too many things I like with it in!
If this is your little sweet treat I really really hope you love them x
ANNIE @ THE GARLIC DIARIES says
Drooling at the caramel oozing out of these delicious little morsels. Yum!!!!
Charlotte Oates says
They were
Laura says
Wow! These look amazing! I love how smooth the chocolate looks, and the caramel sauce just makes my mouth water. You’re going to be everyone’s favourite person if you give these away as gifts!
Charlotte Oates says
Thanks Laura. The smoothness of the chocolate is all down to tempering, if you do that then they come out beautiful and glossy.
This time around they were a treat for me but my mum has already asked me to bring some next time I go. I want to work on more flavours so I can make a whole selection box.
Charlotte Oates says
Thanks Renee. These would also work well with dark chocolate, just remember that when you temper the chocolate you need to heat it to 48C rather than 45C suggested in the recipe for milk chocolate.
Mummy Tries says
Oh. My. Goodness. Incredible! Just like home made rolos. I’m going to have to try this one out, but with dark chocolate. Thanks so much for sharing a fab tutorial lovely 🙂