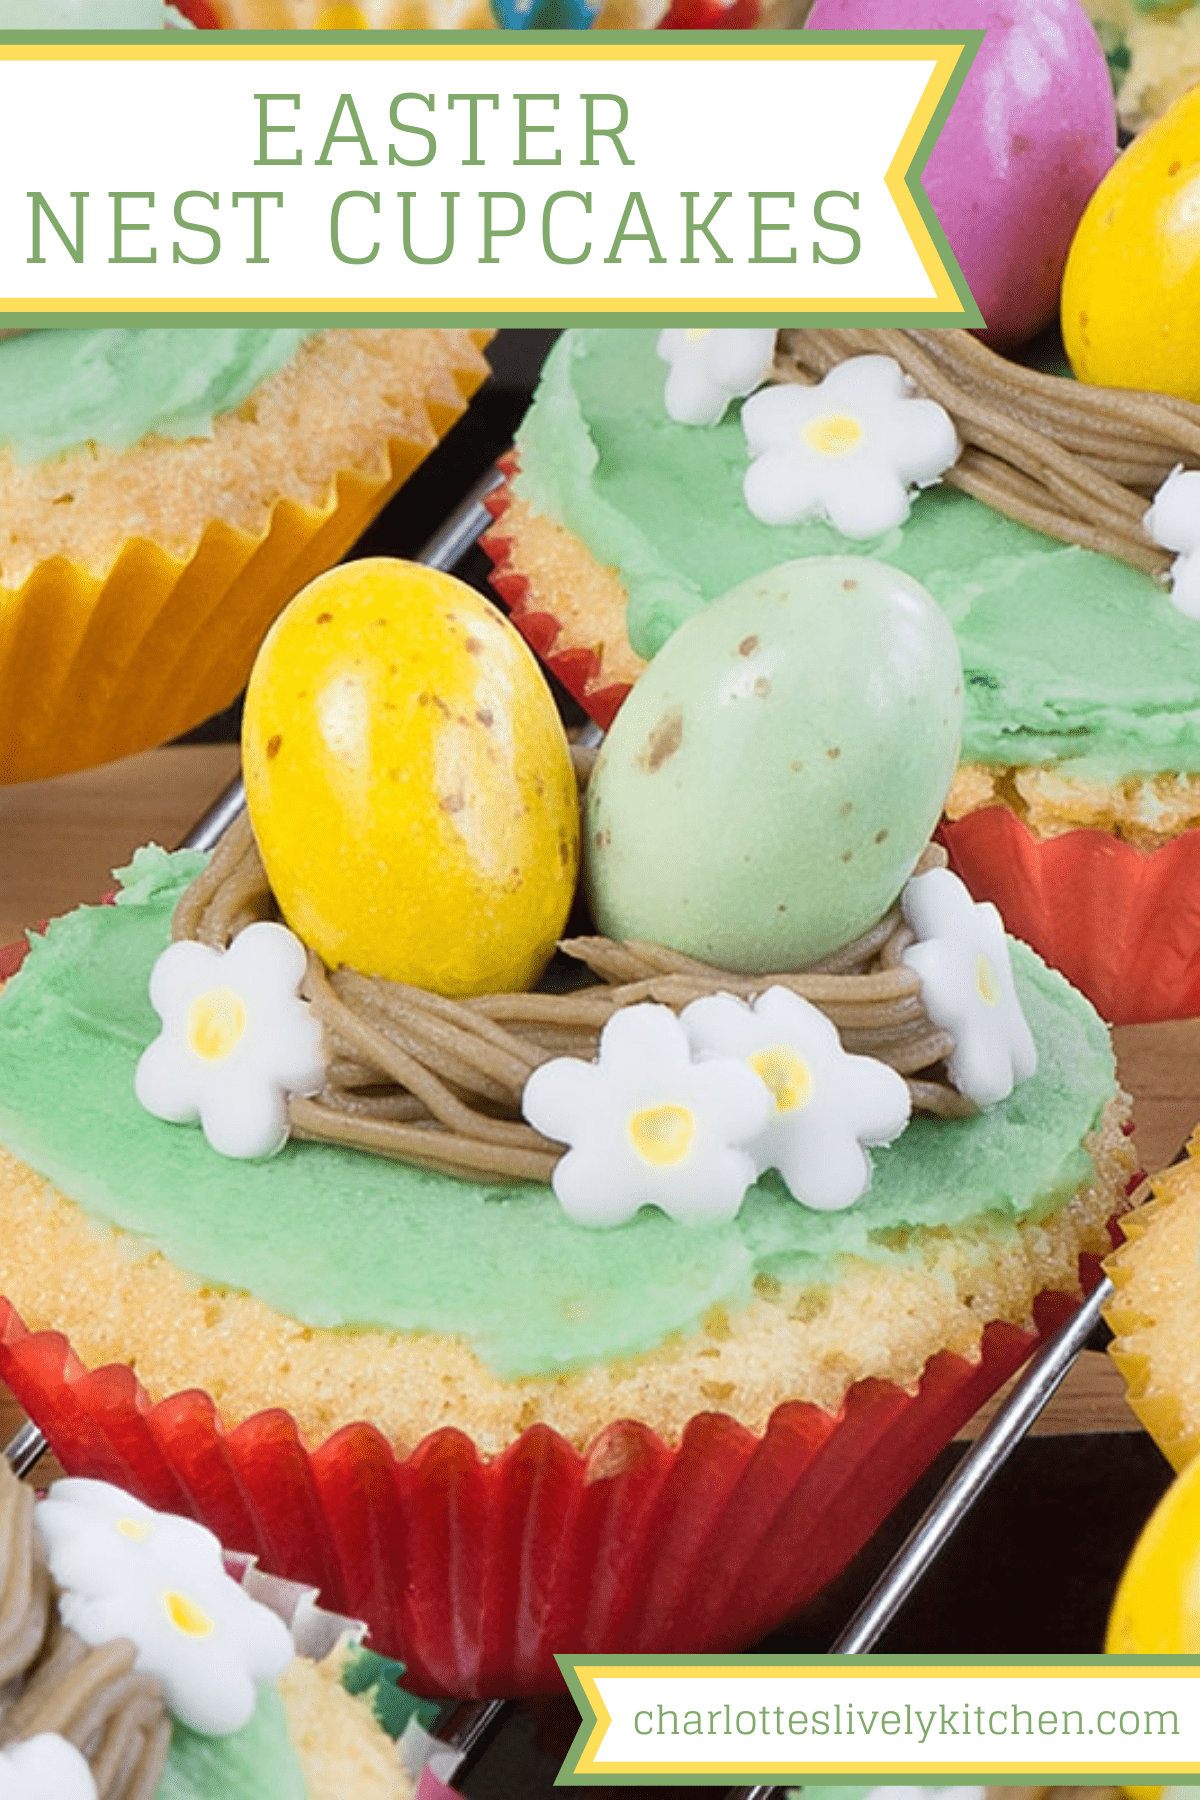
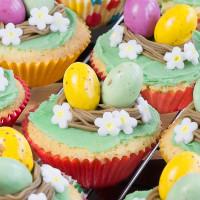
Cute, simple and fun Easter Nest Cupcakes, great for getting your little ones involved in the kitchen this Easter.
Includes the recipes for little vanilla cupcakes and buttercream frosting.
Skip to the recipe | Recipe FAQs
Whenever I’m asked to make something for a school fundraiser, I often decide on cupcakes as they’re so quick and simple and always seem to go down well. Especially with children.
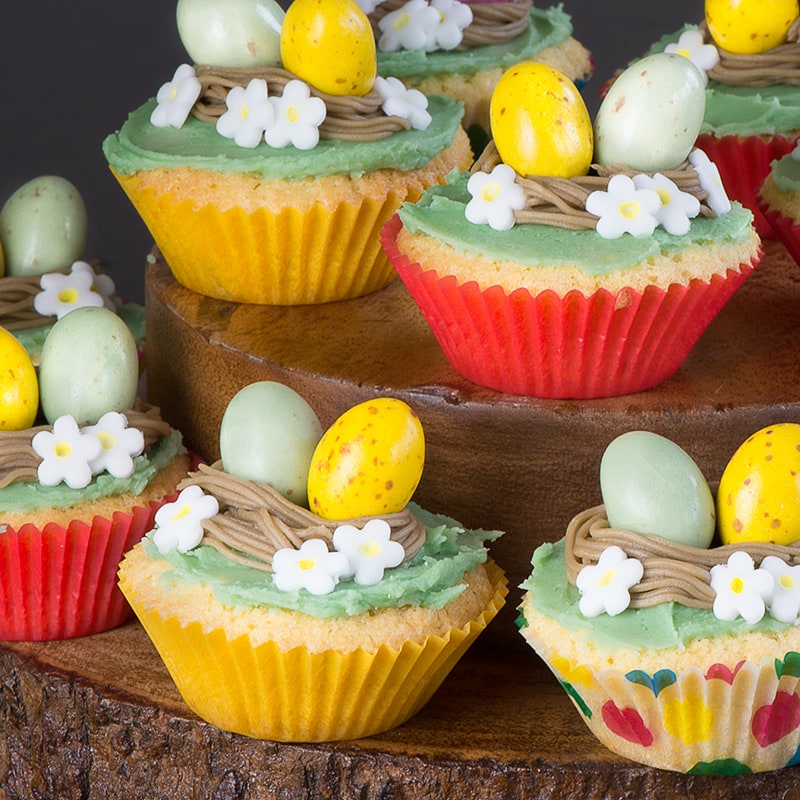
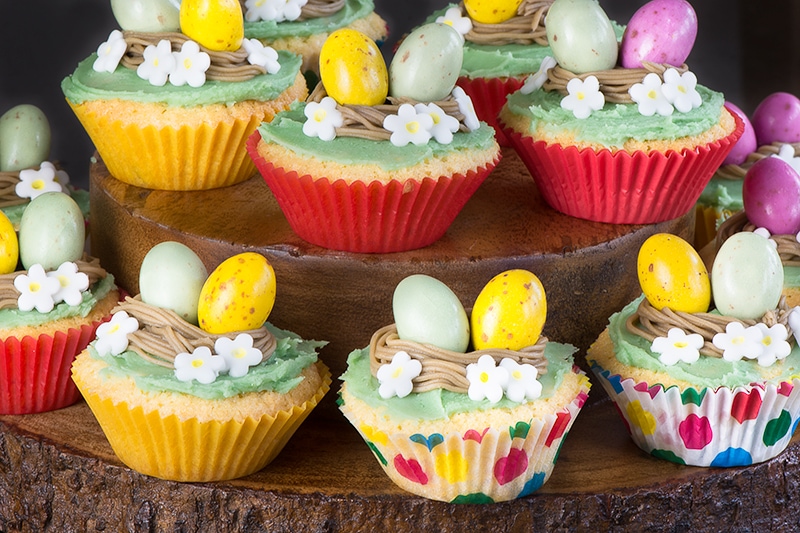
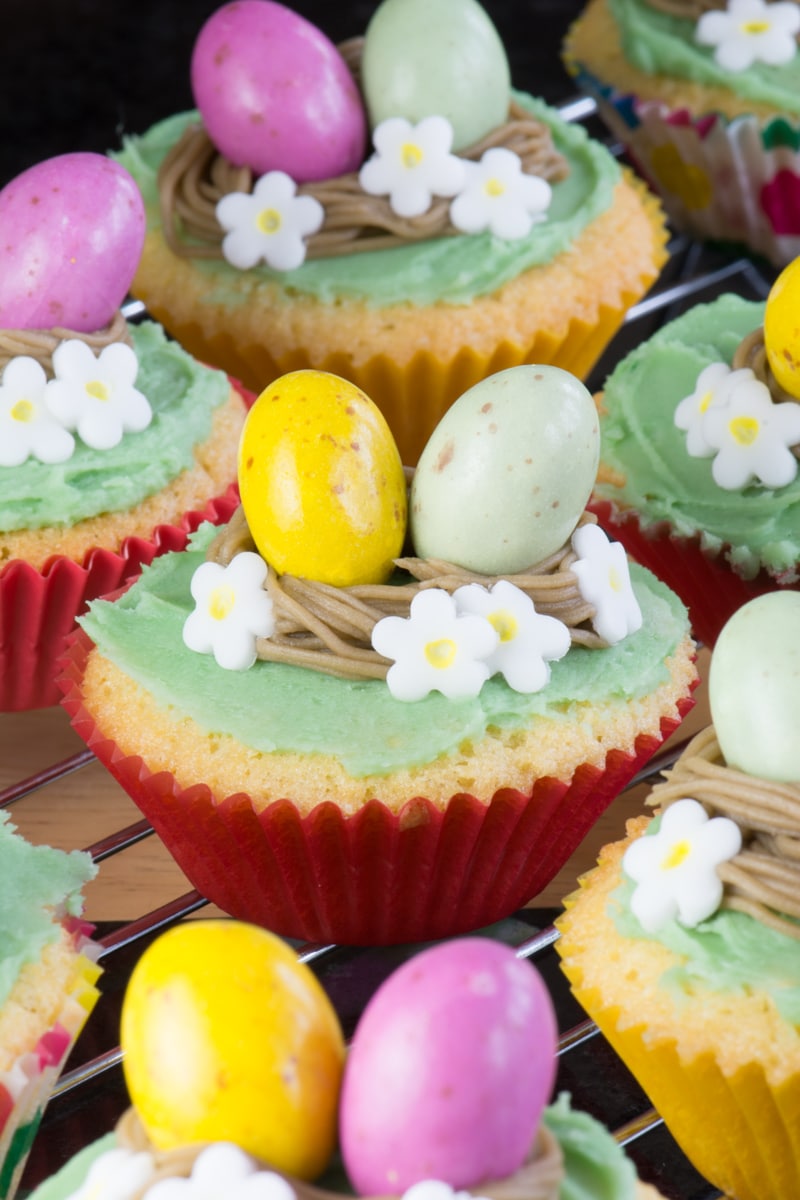
I created these Easter Nest Cupcakes when I wanted to make something simple but with a bit of an Easter theme. They proved popular with the children (I think there’s something very tempting about mini eggs stuck to a cake!).
I’ve tweaked the design a little from that first batch, with smaller cakes, lighter coloured icing, and the addition of little flowers (in my experience almost any decorated cake can be made prettier with a few little flowers added to it!).
They’re really simple so great to make with little ones.
Easter nest cupcake FAQs
If it’s your first time making this recipe or you have a question, please take a moment to have a read through my FAQs for some extra tips and allergen information.
Can I turn any cupcake recipe into easter nest cupcakes?
This cupcake recipe is great for making with children as you simply put everything into a bowl and give it a good stir.
However, you can use any cupcakes you like, or simply use ready-made ones from your local shops.
You can get some inspiration for other flavoured cupcakes and buttercreams from my Mix-and-Match Cupcake Creator.
It is important that the cupcake recipe you choose is designed to have a flap top. All of my cupcake recipes are designed this way for easy decorating.
Can I make these cupcakes as a full-sized cake?
I made these cupcakes using my super easy go-to vanilla cupcake recipe (just my all-in-one vanilla birthday cake sponge in littler form).
By following that recipe you could then decorate the top of the sponge with the green icing, nest, mini eggs and flowers to create a full size version.
You may need to adjust the quantities of the decorations to suit the larger layer cake.

Can I make these easter nest cupcakes vegan?
Yes you can – I would recommend using my Vegan Vanilla Cupcakes as a base and my Vegan Vanilla Buttercream for the decorations.
You will also need to make sure that any mini egg decorations and gel food colouring are suitable for vegans.
What is the best type food colouring to use?
I use Sugerflair Gel Colour when baking. Gel colours don’t affect the texture of the buttercream and give a move vibrant colour than liquid colours.
What is this recipe free from? Who is it suitable for?
The ingredients I used to make this recipe are all free from the following allergens. However, please check any labels carefully for allergens you need to avoid as brands can vary, and product recipes can change over time.
- Suitable for Vegetarians
- Tree-Nut Free
- Peanut Free
- Sesame-Free
- Soya-Free
- Sulphur Dioxide and Sulphite-Free
- Lupin-Free
Other Easter Recipes You Might Enjoy
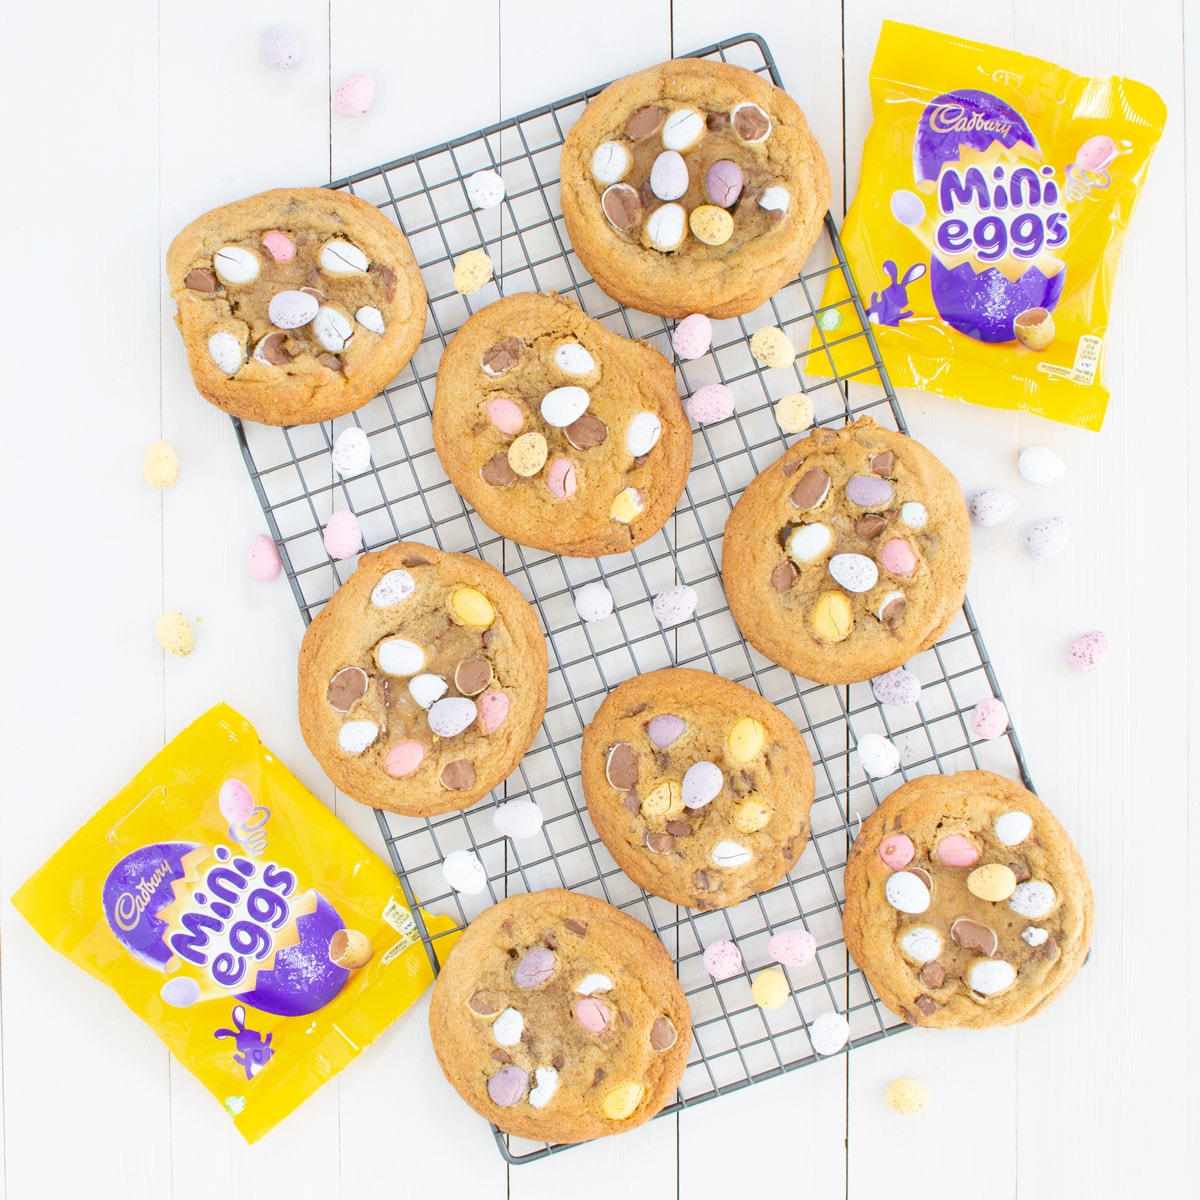
If you’re after some more Easter baking inspiration then take a look at my Easter recipes index. Including my popular Mini Egg Cookies.
Easter Nest Cupcakes
Equipment
- Piping bag fitted with a grass nozzle
INGREDIENTS
For the cupcakes
- 110 g self-raising flour
- 1 tsp baking powder
- 2 eggs
- 110 g soft margarine
- 110 g caster sugar
- A few drops of vanilla extract
- 2 tsp milk
- 12 small cupcake cases
For the vanilla buttercream
- 100 g unsalted butter - at room temperature
- 200 g icing sugar
- a few drops of vanilla extract
- a little milk
For the nest decoration
- brown gel food colouring
- green gel food colouring
- 24 small chocolate eggs
- white fondant icing
- yellow food colouring pen
- flower sprinkles - or a flower cutter
INSTRUCTIONS
Make the cupcakes
- Pre-heat your oven to 160ºC/140ºC fan.
- Put your cupcake cases into a small muffin/cupcake tin.
- Sift the self-raising flour (110g) and baking powder (1 tsp) into a large bowl. Add the other ingredients (2 eggs, 110g soft margarine, 110g caster sugar, 1 tsp milk and a few drops of vanilla extract) and give everything a good stir until it’s fully combined.
- Spoon the mix into the cupcake cases, ensuring it is evenly divided, and put the cupcakes into the oven for 18-20 minutes. To check if they’re cooked insert a skewer and if it comes out clean then the cakes are cooked, if not pop them back in for a couple more minutes.
- Once cooked, remove them from the tray and move them to a wire rack to cool completely before decorating.
Make the vanilla buttercream
- Cut the butter (100g) into cubes and beat until soft.
- Add the icing sugar (200g) and a few drops of vanilla extract and beat until fully combined.
- You’ll find that the buttercream is quite stiff so add a little milk (about 1 tsp at a time) and beat until fully combined until your buttercream has a spreadable consistency.
Decorate the cupcakes
- Take ¼ of you buttercream and add some brown gel food colouring (add a little at a time as you can always add a bit more if you want to make it darker, but you can’t take it away!). Mix until the colour is even. Fit a piping bag with the grass nozzle and fill it with the brown buttercream.
- Add green food colouring to the remaining buttercream and once again, mix until the colour is even.
- Put some green icing on top of your cupcake and spread it until it is relatively even.
- Pipe the brown icing in a circle on top of the cake, go round about 3 times to add a little height to your nest.
- Put 2 chocolate eggs into the nest.
- If you’re making your own flowers – roll out a little fondant icing, use the flower cutter to cut out about 48 flowers and draw a dot in the centre of each with the food colouring pen.
- Decorate each nest with a few flowers.
Any nutritional information provided is the estimated nutritional information per serving. Please refer to my guide to Charlotte’s Lively Kitchen nutritional information if you would like to learn more about how this is calculated.
Leave a Reply