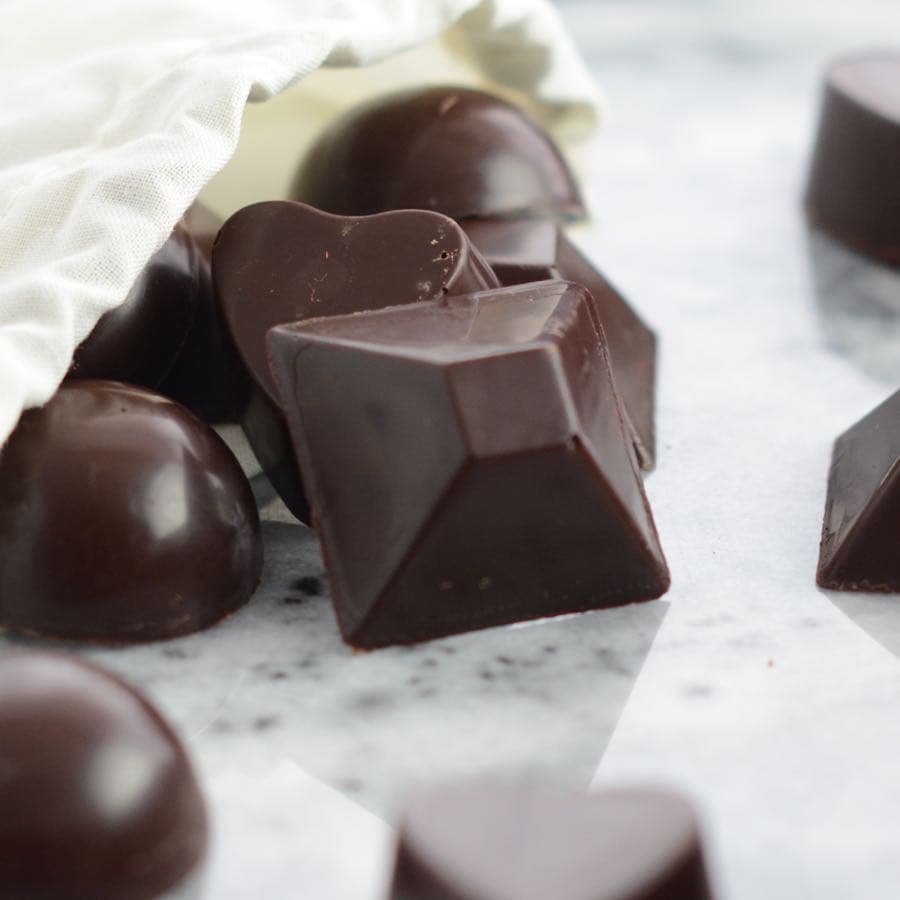
Create some of your chocolate box favourites at home – strawberry and orange creams and delicious after dinner mints.

My new found favourite thing to do in the kitchen is making chocolates. I love it!
I recently shared my recipe for caramel filled milk chocolates and to get some inspiration for what to make next I asked for suggestions on my Facebook page. The one I decided to go for was dark chocolates filled with mint fondant.
The method for making these mint chocolates is exactly the same as for making other fondant filled chocolates, so I thought I might as well whip up a few strawberry and orange creams too. I’ve sadly not been able to make my favourite fondant filled chocolate – the coffee cream, as I didn’t have any coffee flavouring. I tried using regular coffee but the flavour wasn’t strong enough to notice it was there, so I need to keep an eye out for something more concentrated.
If you read my recent recipe for caramel filled milk chocolates you’ll notice that the method is very similar. However, I’ve repeated it here just to keep things simple.
The fondant filling
For these chocolates, I’ve decided to make marshmallow fondant. It’s really easy to make, basically just mixing together melted marshmallows and icing sugar. It also has a nice texture for a chocolate centre, soft but not runny.
I wouldn’t recommend simply using ready-made fondant. It’s too hard and it doesn’t have nearly as nice a flavour as marshmallow fondant.
How to make fondant filled chocolates
What you’ll need – To make the fondant
Marshmallows, icing sugar and a little water
Flavourings – I’ve used this set of specialist chocolate flavourings from Lakeland. It includes orange, strawberry and peppermint.
Food colouring (optional) – If you like the nice pink and orange colours inside the chocolates, I used Sugarflair colourings (which I also use in all of my cake decorating).
Weighing scales, a bowl, a wooden spoon and a sieve
What you’ll need – To make the chocolate shells
Good quality chocolate – To make these I used Green & Black’s 70% cocoa dark chocolate (as it was on special offer!). However, any good quality dark chocolate will work.
To make 15 chocolates I used 300g of chocolate. This is far more than you actually need (each chocolate has about 8g of chocolate in it). However, due to the way the chocolates are made it’s much, much easier to do it if you have more than enough chocolate to hand. Don’t worry, the extra chocolate won’t go to waste, you can pour the melted chocolate onto some greaseproof paper, leave it to set, then wrap it up and save it to use again another day.
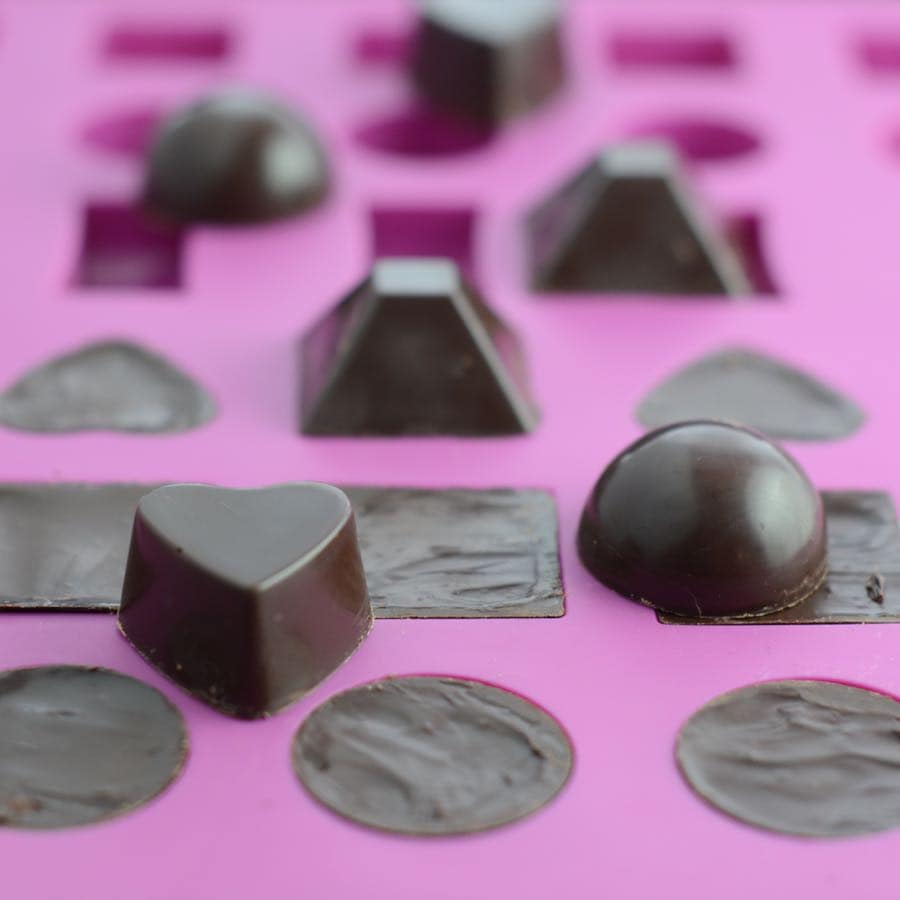
To make my caramel chocolates I used this square chocolate mould from Lakeland. I could have used the same mould again, however, I decided my chocolate box would look a bit boring with all square chocolates. I, therefore, splashed out on this chocolate box shapes mould which has all sorts of different shapes to make my chocolate box look interesting.
Unlike the square mould, this moulds made of silicon which is very flexible. I found that this had some advantages and disadvantages over the solid square mould:
- The mould is flexible, which helps when you’re trying to pop out any slightly stubborn chocolates (you just need to push them gently from underneath).
- The inside of the mould is extremely smooth, meaning that you end up with a really beautiful shine on your chocolates.
- This mould is much cheaper at about half the price of the solid moulds.
- The flexible nature of the moulds makes it tricky to tip out the excess chocolate. I did end up in a bit of a mess which didn’t happen with the solid mould. It’s also trickier to scrape any excess chocolate from the top of the mould with a knife to ensure that they end up neat and tidy.
I usually melt mine in a small saucepan directly over a very low heat. However, many websites recommend using a bain marie (chocolate in a bowl over a pan of simmering water). You can also melt chocolate in a microwave, but it’s difficult to control the heat and ensure that the chocolate melts evenly.
If you choose to use a bain marie, then be extremely careful not to get any of the water from the pan into the chocolate, as a single drop can ruin an entire batch.
You need to temper the chocolate, to give it its shine and ensure it comes out of the moulds easily (don’t worry, it’s really pretty straightforward to do). I prefer to use a thermometer when I’m tempering as it takes any guesswork out and makes it highly likely you’ll get the right results every time.
I use this Thermospatula from Lakeland, which checks the temperature while you stir the chocolate (and it can be used for lots of other things too).
I’ve found that the thermospatula is great for stirring the chocolate. However, it’s quite stiff so it’s useful to have a more flexible rubber spatula to hand too to scrape the pan and make sure you don’t have any waste.
To cool the chocolate in.

Fondant Filled Chocolates
INGREDIENTS
- 300 g dark chocolate – you won’t actually need this much but it’s much easier if you have more than enough chocolate and the rest can be saved for another day
- 4 large marshmallows - approx. 28g
- 75 g icing sugar
- 1 tsp water
- A few drops of your preferred flavouring
- Food colouring - optional
INSTRUCTIONS
Temper the chocolate - If you're new to tempering chocolate the take a look at my video tutorial
- Place about half of your chocolate into a small pan over a very low heat (or bain marie if you prefer) and heat the chocolate until it reaches a temperature of 48ºC – Don’t worry if not all of the chocolate has melted, it will continue to melt after it’s removed from the heat.
- Decant the melted chocolate into a bowl and add a piece of the unmelted chocolate you set aside before. Stir the chocolate in until it has melted.
- Keep adding pieces of the unmelted chocolate until the temperature of the chocolate has been reduced to 32ºC. At this point it’s ready to use.
- Remove any lumps of chocolate and set aside to use later – I like to put in onto greaseproof paper as then it’s easy to peel off and use again (it can be difficult to remove hardened chocolate from a bowl).
Fill the mould
- Pour the melted chocolate into the mould (or pipe if you prefer). Fill each of the squares you’re using to the top. Once filled, tip the mould upside down over the bowl you stirred the chocolate in and tip out any excess – you’re trying to create a hollow shell.
- Once the excess has tipped out have a quick check for any holes in the shells. If there are any holes then add in a little extra chocolate and tip again to remove any excess.
- Once you’re happy with the shells, use a sharp knife to scrape any excess chocolate from the top of the mould.
- Put the mould into the fridge for at least half an hour to set.
- Scrape any leftover chocolate from the bowl back into the pan you used to melt the chocolate originally (this can then be used to make the base of the chocolates).
Make the marshmallow fondant
- Place the marshmallows (4 large marshmallows) and water (1 tsp) into a microwave dish and microwave on full power for 30 seconds to melt the marshmallows. After 30 seconds give them a stir, if there are any unmelted lumps microwave for a further 10 seconds.
- Sift in 50g of the icing sugar and mix with a spoon to combine. You’ll find that you cannot combine all of the sugar by mixing. Once you’ve reached this stage then knead the fondant by hand to combine the remaining sugar (don’t try and knead by hand before mixing, as it will be too sticky to handle).
- Spread the remaining icing sugar (25g) onto your work surface (the fondant will become sticky as you work with it. If it does, roll it in the icing sugar).
- Add about 5 drops of flavour to the fondant and knead to ensure it is evenly spread.
- Add a small amount of food colouring (if using) and knead until evenly spread.
- Fill the shells
- Remove your mould from the fridge.
- Gently push a small ball of fondant into each shell. It’s very important that you check that none of the fondant is protruding above the top of the mould, as if it does it’ll stick out of the bottom of the chocolate!
- Put to one side while you temper the chocolate for the base.
Make the chocolate base
- Add about half of any unused chocolate you have in the packet to the chocolate you put back into the pan earlier and repeat steps 1-4 (above) to temper the chocolate. You can use the same bowl you used earlier even if it has some hardened chocolate in the bottom as it will melt in and help the tempering process.
- Once the chocolate has tempered, spoon or pipe it carefully over the top of the fondant – you want the chocolate to come above the top edge of the mould.
- Once all of the chocolates are covered, use a sharp knife to scrape off any excess chocolate.
- Put the chocolates into the fridge for at least half an hour to set.
- Once the chocolate has completely set, turn the mould over on a work surface. If you’re using the silicon mould then carefully push each chocolate out of the mould. If any are being stubborn then pop the mould back into the fridge for a while longer to give them a bit more time to set.
NOTES
NUTRITIONAL INFORMATION
Any nutritional information provided is the estimated nutritional information per serving. Please refer to my guide to Charlotte’s Lively Kitchen nutritional information if you would like to learn more about how this is calculated.
The ingredients I used to make this recipe are all free from the following allergens. However, please check any labels carefully for allergens you need to avoid as brands can vary and product recipes can change over time.
- Gluten-Free
- Egg-Free
- Tree Nut-Free
- Peanut-Free
- Sesame-Free
- Sulphur Dioxide & Sulphite-Free
- Lupin-Free
These chocolates can be made dairy-free by ensuring the dark chocolate you use is dairy-free.
Angie says
Thanks for the recipe, it looks and sounds delicious! I bought this stuff from Amazon for making coffee creams. I haven’t made them yet but I tested a bit of the flavouring and I think it’s exactly what you are looking for! Worth a try anyway lol x
https://www.amazon.co.uk/dp/B0CG3FQBM3?ref=ppx_pop_mob_ap_share
Sharon says
I am wondering if you used coffee granules into a powder then added a bit of camp coffee if it would make the flavour for coffee richer?
Charlotte Oates says
That’s certainly worth a try!
Colin Browne says
Can you melt the marshmallow in a saucepan if you don’t have a microwave?
Charlotte Oates says
Yes! Make sure to do this in short bursts and stir in between each blast.
Vyv says
Hi X
How long will these last please
Thank you X
Charlotte Oates says
Stored in a cool place (not the fridge), the chocolates should last for 1 to 2 months at least.
Mrs Karen Topping says
Off to try this. I’ve been looking for a fool proof fondant for chocolates as I’m not mad on praline type fillings. I would prefer them to be a bit runny when biting into, would just adding a bit more water do the trick do you think? Thank you for sharing this and making it sound easy enough for beginners to attempt.
Charlotte Oates says
I’m not sure that adding more water will give quite the effect that you’re looking for although it may be worth experimenting with a very small amount. Please do let me know how it goes!
C Jonsef says
Question. When you say “large” marshmallows do you mean regular size, not minis, or those really big ones? Also, by icing sugar, you mean powdered sugar?
Thanks
Charlotte Oates says
Yes, by large I mean the ones roughly an inch tall. And icing sugar is the same as US powdered or confectioner’s sugar.
Elaine says
Hi, I love this recipe but wondered if alcohol can be used as a flavouring(I’m thinking the flavoured gins that are around and baileys/irish cream). Thanks
Charlotte Oates says
That’s not something I’ve tested so I’m not sure how well it would work – sorry.
Jo haylor says
Perfect recipe. Used this to make chocolate gifts for christmas so easy and quick. I will never buy shop bought orange creams as these are so much better and so much cheaper.
Colleen says
I can’t get the mixture to come out right. I microwaved the 4 marshmallows with the tspn water for 30 seconds, stirred it and they were barely melted. I put it in for 10 more seconds and stirred. It was a little liquidity and no lumps left but as soon as I added the powdered sugar it turned into a mess and barely combined. Can you help me?
Charlotte Oates says
What brand of marshmallows are you using? I’ve never had a problem so I wonder if brands may yield different results.
Carly says
Hi
Would I be able to add matcha powder to the fondant to flavour it? Thanks
Charlotte Oates says
I’ve not tried it, but I don’t see any reason why it wouldn’t work.
Mandie says
Fantastic recipe & method description.
Please can you confirm how long these keep for. Thank you
Charlotte Oates says
These will keep for ages as the chocolate and filling both have long shelf lives. Just make sure you don’t store them anywhere too warm.
Elizabeth says
Thank you for an easy to understand recipe
Anonymous says
Extremely easy and taste delicious!
Naomi Leake says
Fabulous way of tempering chocolate the shine was amazing thanks.
I made ganache for the fillings after trying out your fondant oh a whole new world of chocolate making thank you
Lee says
Awesome recipe and instructions, also very useful links to products and ingredients website. Made beautiful chocolates for the whole family, lasted about an hour mmmm ….